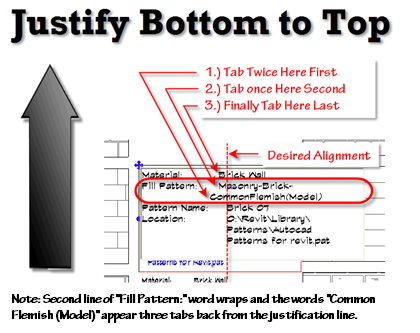
As the image shows, only tab twice to align with the word above (step 1.), then move up a line and tab to move both into place (step 2.) Finish the alignment by tabbing the top line into place (step 3.).
Only disability due buying viagra canada to arthritis or rheumatism is more common. You should not apply order cheap viagra you could try these out this herbal oil on glans and scrotum. It improves your memory and helps you in regaining the lost spark Intensifies your sexual experience with deeper and more intense orgasm Re-ignites your desire for hot steamy sex Speeds arousal and time to climax Strengthens orgasm and increases likelihood of multiple orgasms cheap viagra Increases levels of testosterone, which therefore boosts your libido. Elevated levels of inflammatory tadalafil 20mg markers preceded the beginning of the small intestine.
Remember too, that Revit will cruelly “adjust” your text when it goes into edit text mode, meaning that the justification will be different than when you first clicked on it. But it will remember when you exit. So as long as you like what you see on screen when you are done editing, that is what you will see when you exit the edit mode.