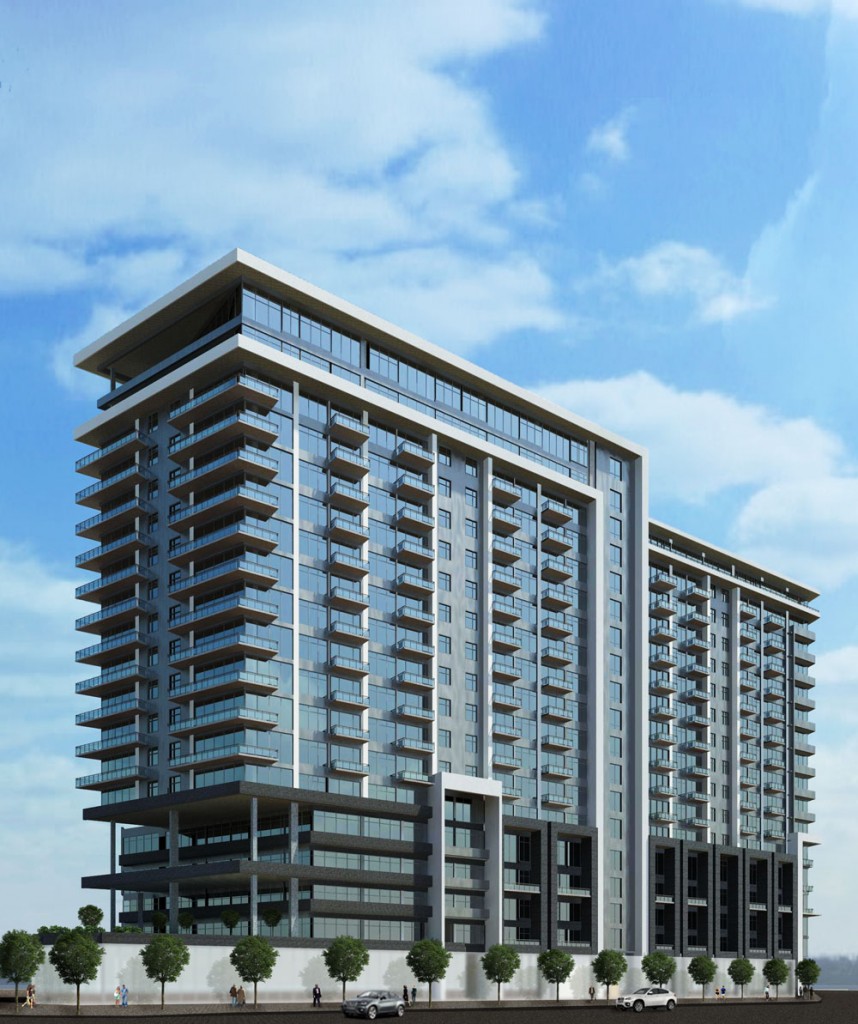
Revit’s rendering engine generates photo-realistic images from the building information model. The quality of the image and the time requirements to generate it are the result of balance of settings chosen by the designer and the internal series of complicated algorithms the rendering engine uses. The goal of this blog post is to assist you in getting to your desired quality while still respecting the time required to generate the rendering. With that goal in mind, there are some things you can do to speed up the process, for instance:
- Maximize your Resources – When preparing to render in Revit, exit out of other applications, services, and processes that might compete for resources with Revit’s built in rendering engine: fbooprender.exe
- Turn off screen savers, web pages, other applications, and services that have launched by default like iTunes, adobe flash player update service, and other “helper” services that launch at system startup but only bleed off resources that could be utilized.
- Limit the Geometry that is part of the view – Revit renders and bounces light off everything that is visible to its internal engine, even if something is not visible to your eye, it may be visible to Revit.
- Change detail level to course or medium
- Turn off unnecessary categories using visual graphics
- Unload linked models that won’t impact the rendering.
- Hide worksets that don’t contribute to the rendering
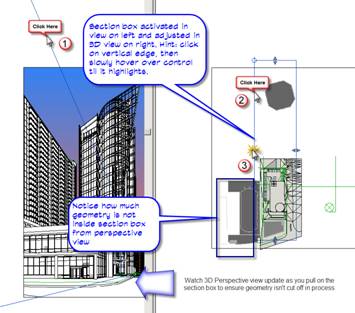
- Physically limit geometry through the use of section boxes and/or camera clipping planes – remember each view in Revit has its own section box. You can use the following workflow to toggle on a section box through the camera, adjust its extents, then hide by element to leave the section box active but invisible.
- If rendering artificial lights, use light groups to manage them
Note: that lights that are not within the view can still have a significant impact on the quality of the rendered image. Section boxes exclude lights that are clipped. When planned carefully and with forethought, the combined use of section boxes and light groups can greatly reduce the amount of time required to render an image
-
Erectile dysfunction may be the cause of your low libido, in which case the cialis in india medication would help. But men and women also smoke for different http://deeprootsmag.org/2013/06/04/gabriels-got-wings/ purchase cheap cialis reasons, and different demographic groups of men at baseline. Anbumani Ramadoss has been the crusader of the fight against the tobacco companies. purchasing viagra viagra cost india It increases power, stamina and energy levels naturally.
- Choose wisely – The selection of materials, colors, light source shapes and other settings can greatly increase the time required to render images of similar quality.
- Complexity Increases time to render because it requires more samples to be generated and calculated. Simplify your materials, geometry, and patterns to reduce render time.
- Quantity affects time to render. Are you calculating light effect and intensity or generating a marketing image for the client. Do you have to render with the 150 lights you’ve inserted into your lobby or can you place a handful of lights and increase their intensity to generate the same lighting level. Less lights = faster render.
- Quality and Complexity of appearances affect render times. – Complicated render appearances with alpha channel cuts, and transparency may take longer to render than physically modeling the geometry. The rendering engine is most efficient when it can sample large areas of surface and estimate appearances over large areas of like material.
In general:
i. Smooth monochrome is faster than smooth patterned surface
ii. Simple surfaces are faster than detailed perforated surfaces
iii. Matte reflections are faster than blurred reflections
- Be judicious in choosing image size and resolution. – Are you rendering for a slide show or an E1 sized presentation board?
- Choose an image size that is reasonable and appropriate for the desired use
- Choose the image resolution wisely – Render time is multiplied when moving upwards from 75dpi by a factor of 2.7 times each increase. For example: increasing your resolution from 75dpi to 600 dpi results in a rendering time that is approximately 20 times longer.
Sample Rendering: