So Proud of my Son

So Proud of my Son

Thought I’d share with you a little success my son has had with TSA at his highschool.  Earlier this school year, he entered the Architectural Design competition at the TSA technology day at the state fair in Georgia.   The challenge was to design a garage with workshop.  He put together a design plan for a wood working shop inside an enlarged 3 car garage. Here was the design challenge copied from the flyer:

Design Challenge Background:

DIY (Do-it-yourself) is coming back into style. Many home owners are adding separate multi-use buildings to park vehicles and have a workshop as well.

OBJECTIVE:
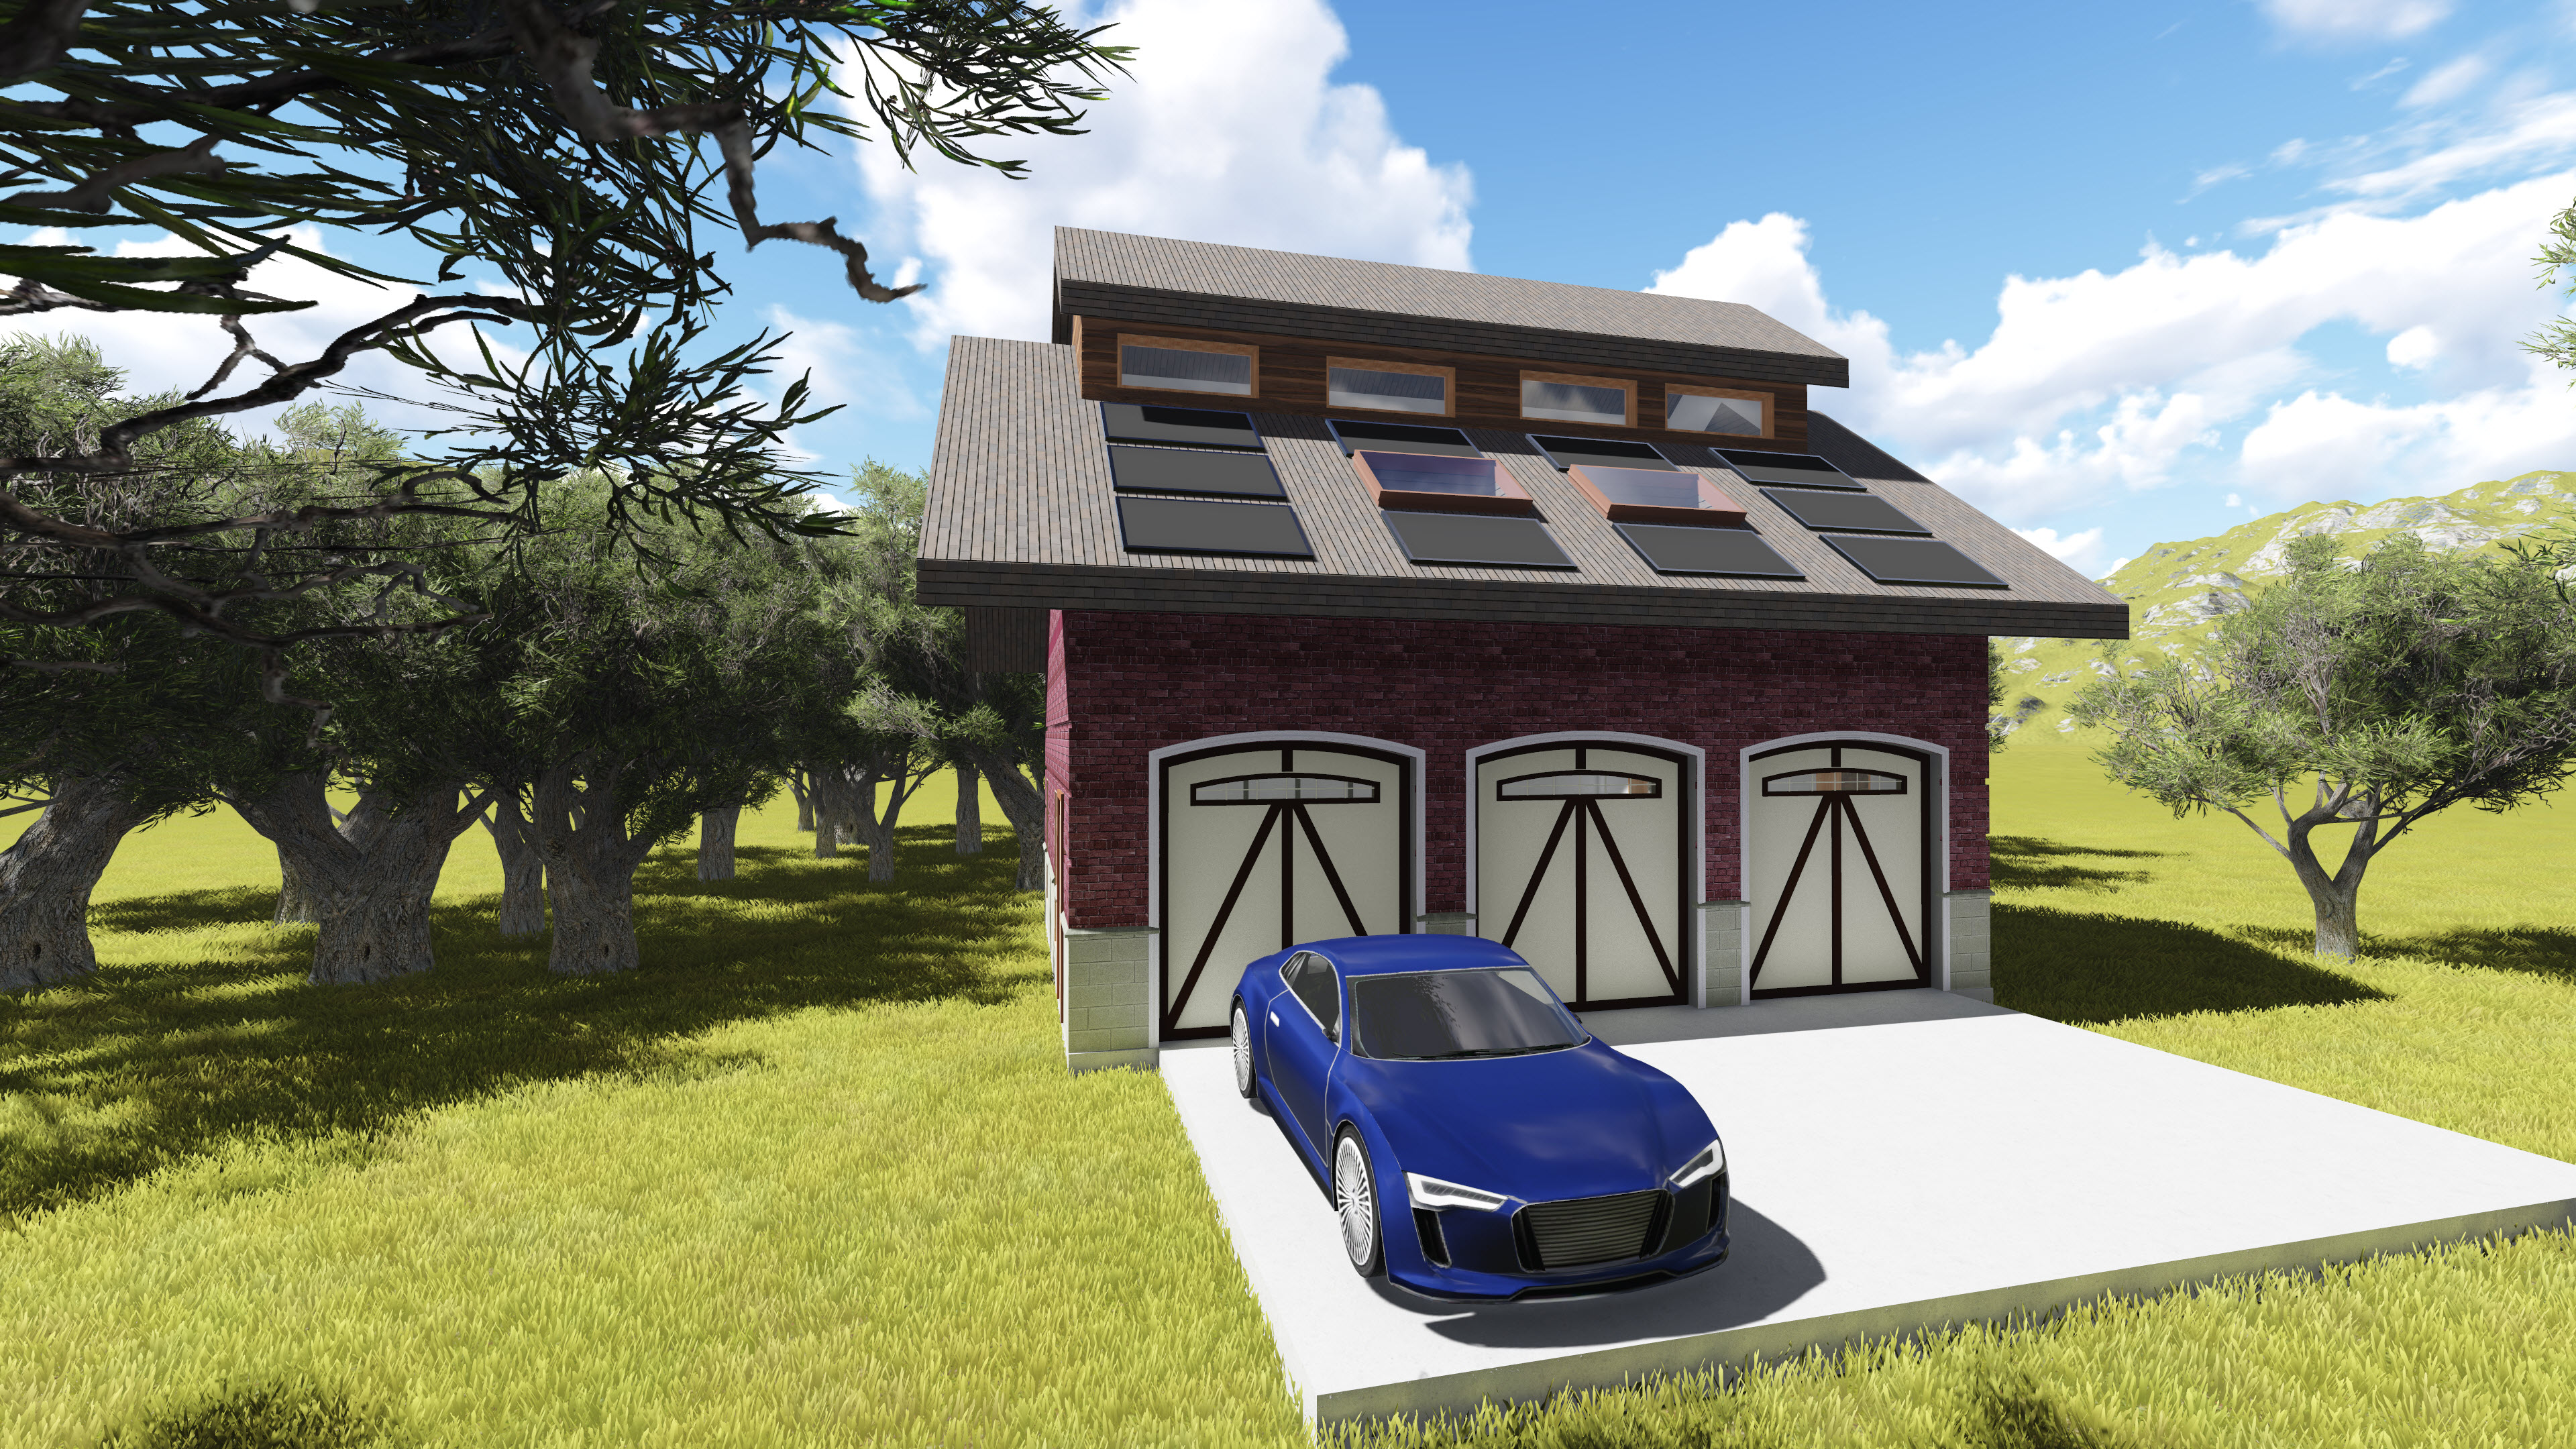
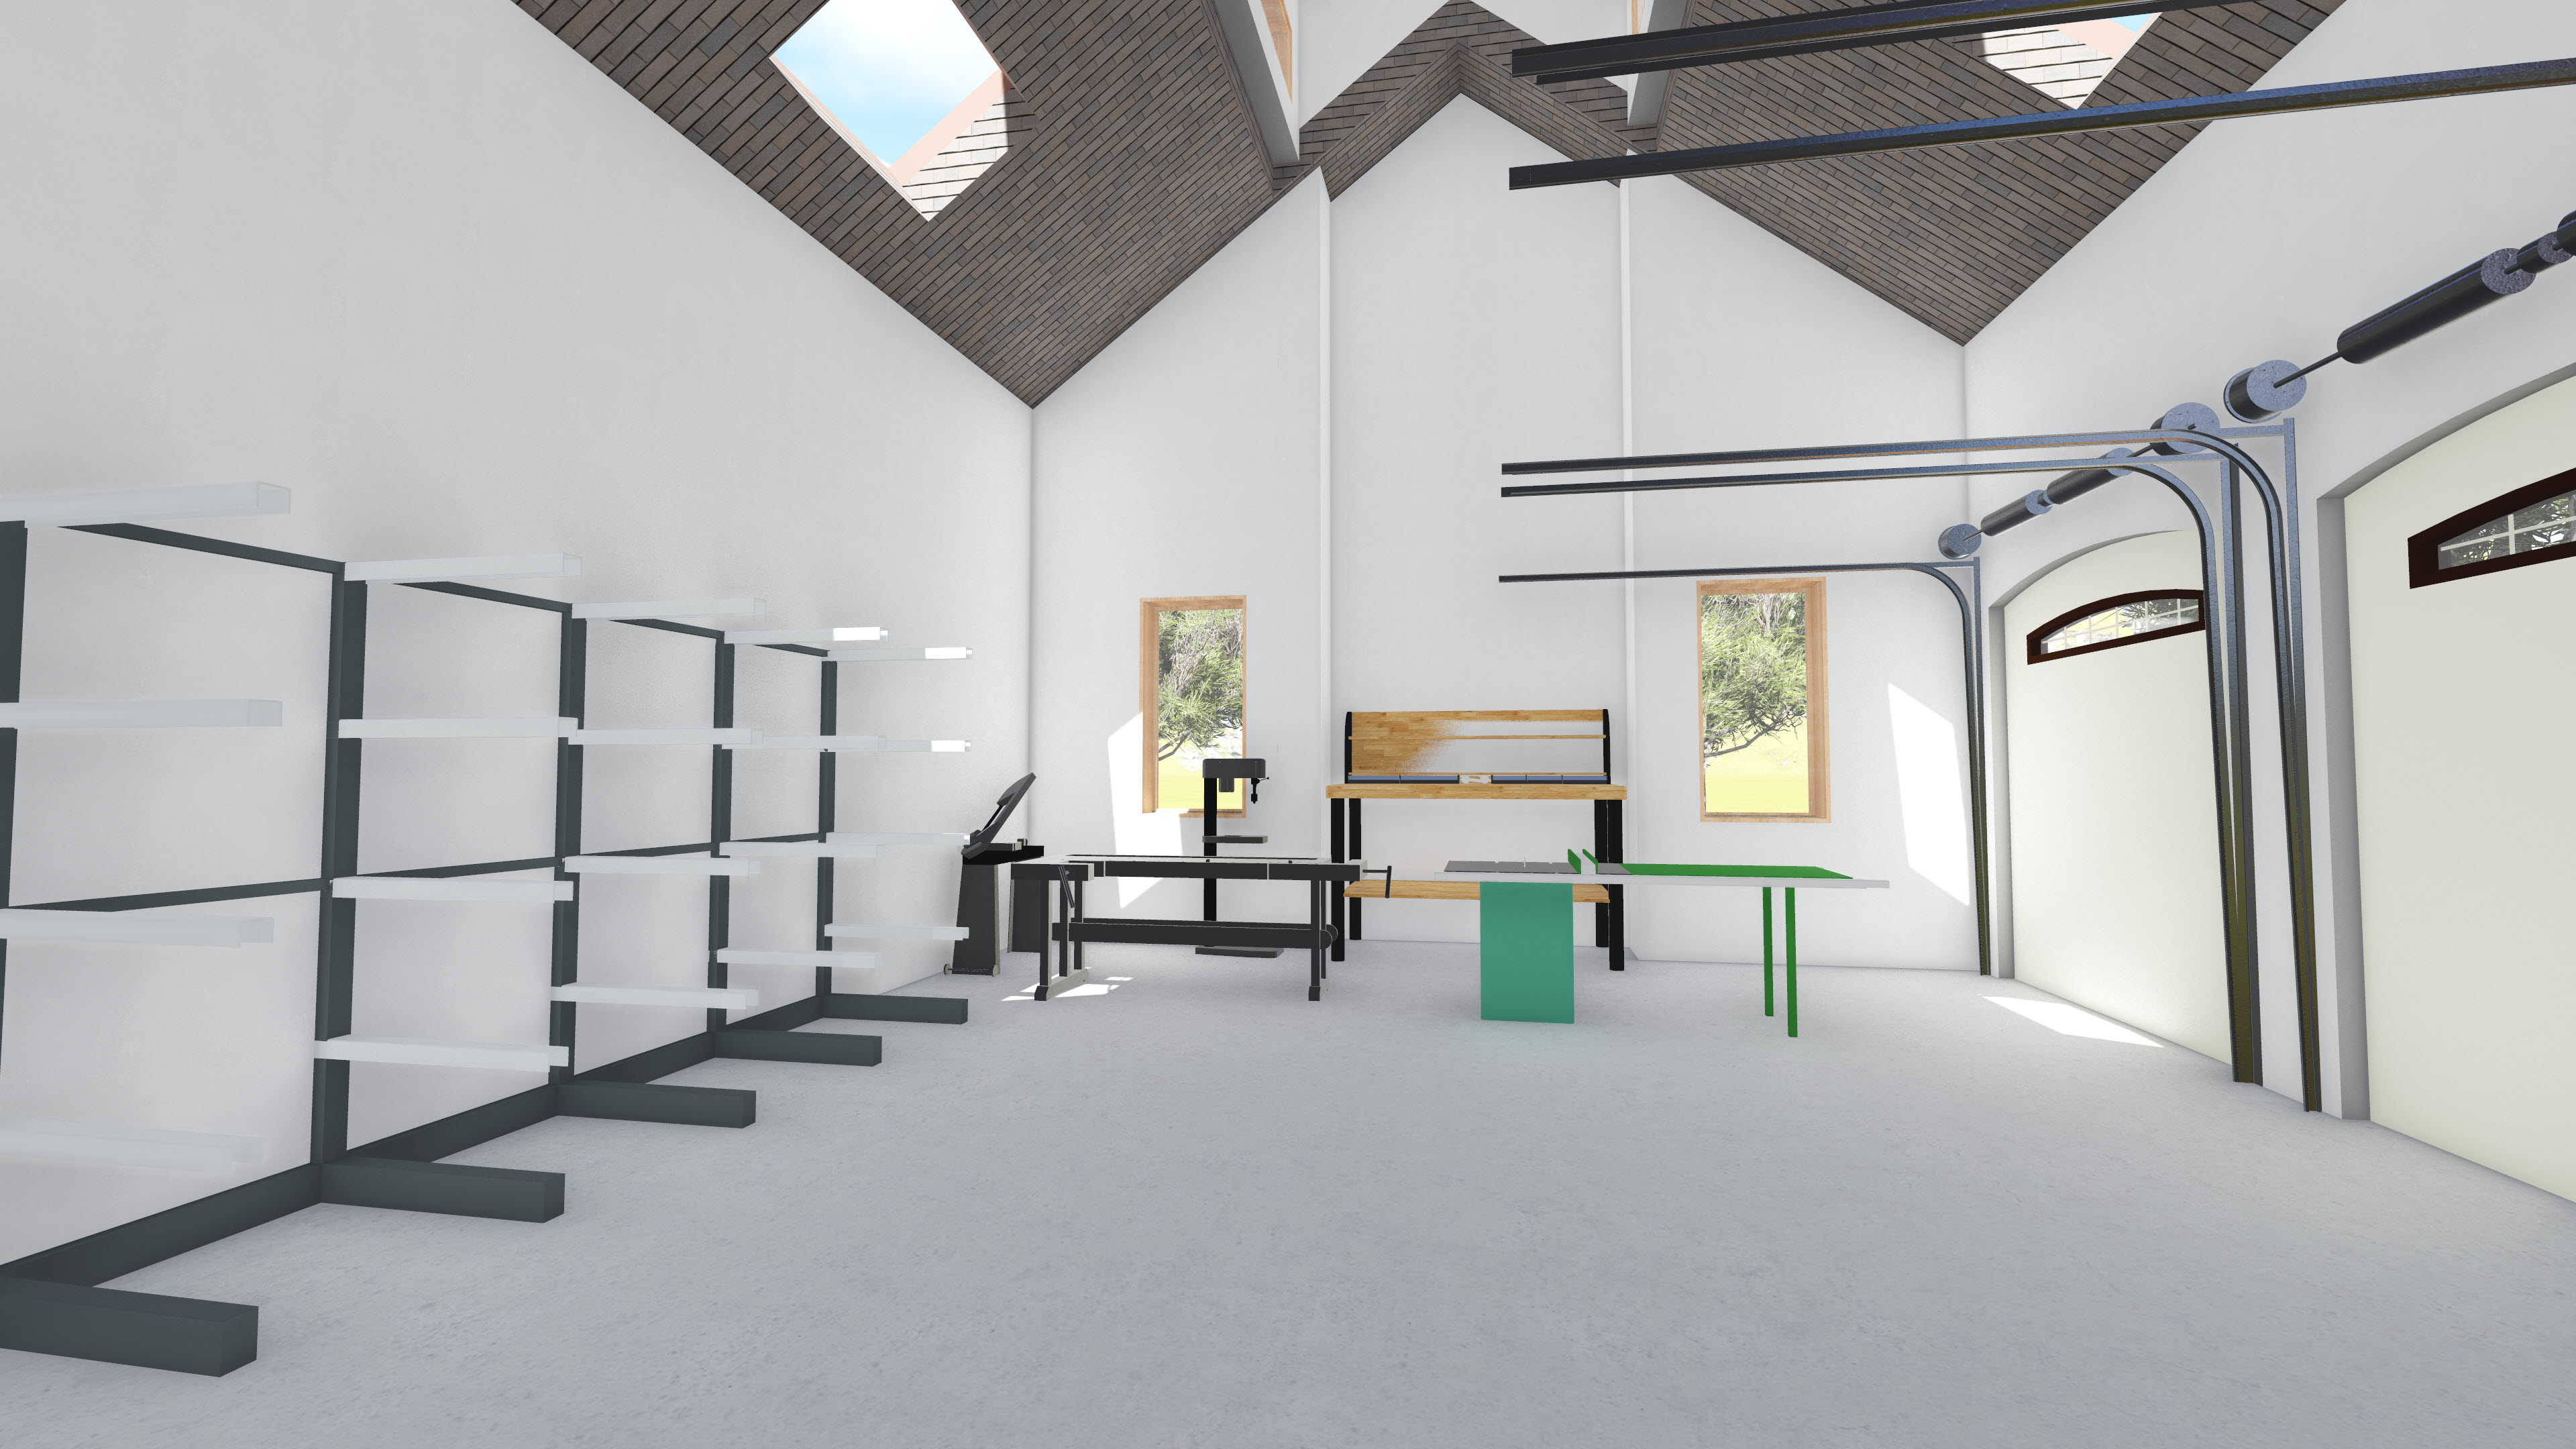
The challenge is to design one of these garage/workshops for a client. Your job is to act as an architect and prepare a pro-posed design for a client who wants to park two cars and have a workshop in the same building, separate from the main house. You do not have to include a main house. The entry needs to be only the garage/workshop. Consideration needs to be made for getting materials into and large projects out of the workshop. Research what machines would be included in the workshop and where they may be placed inside for safe use. Also include some space for storage.

Here is what he submitted:

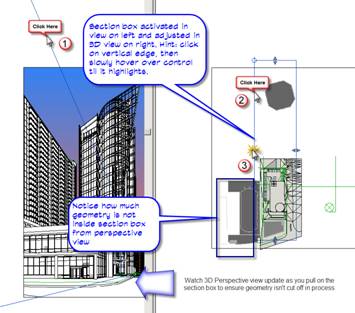
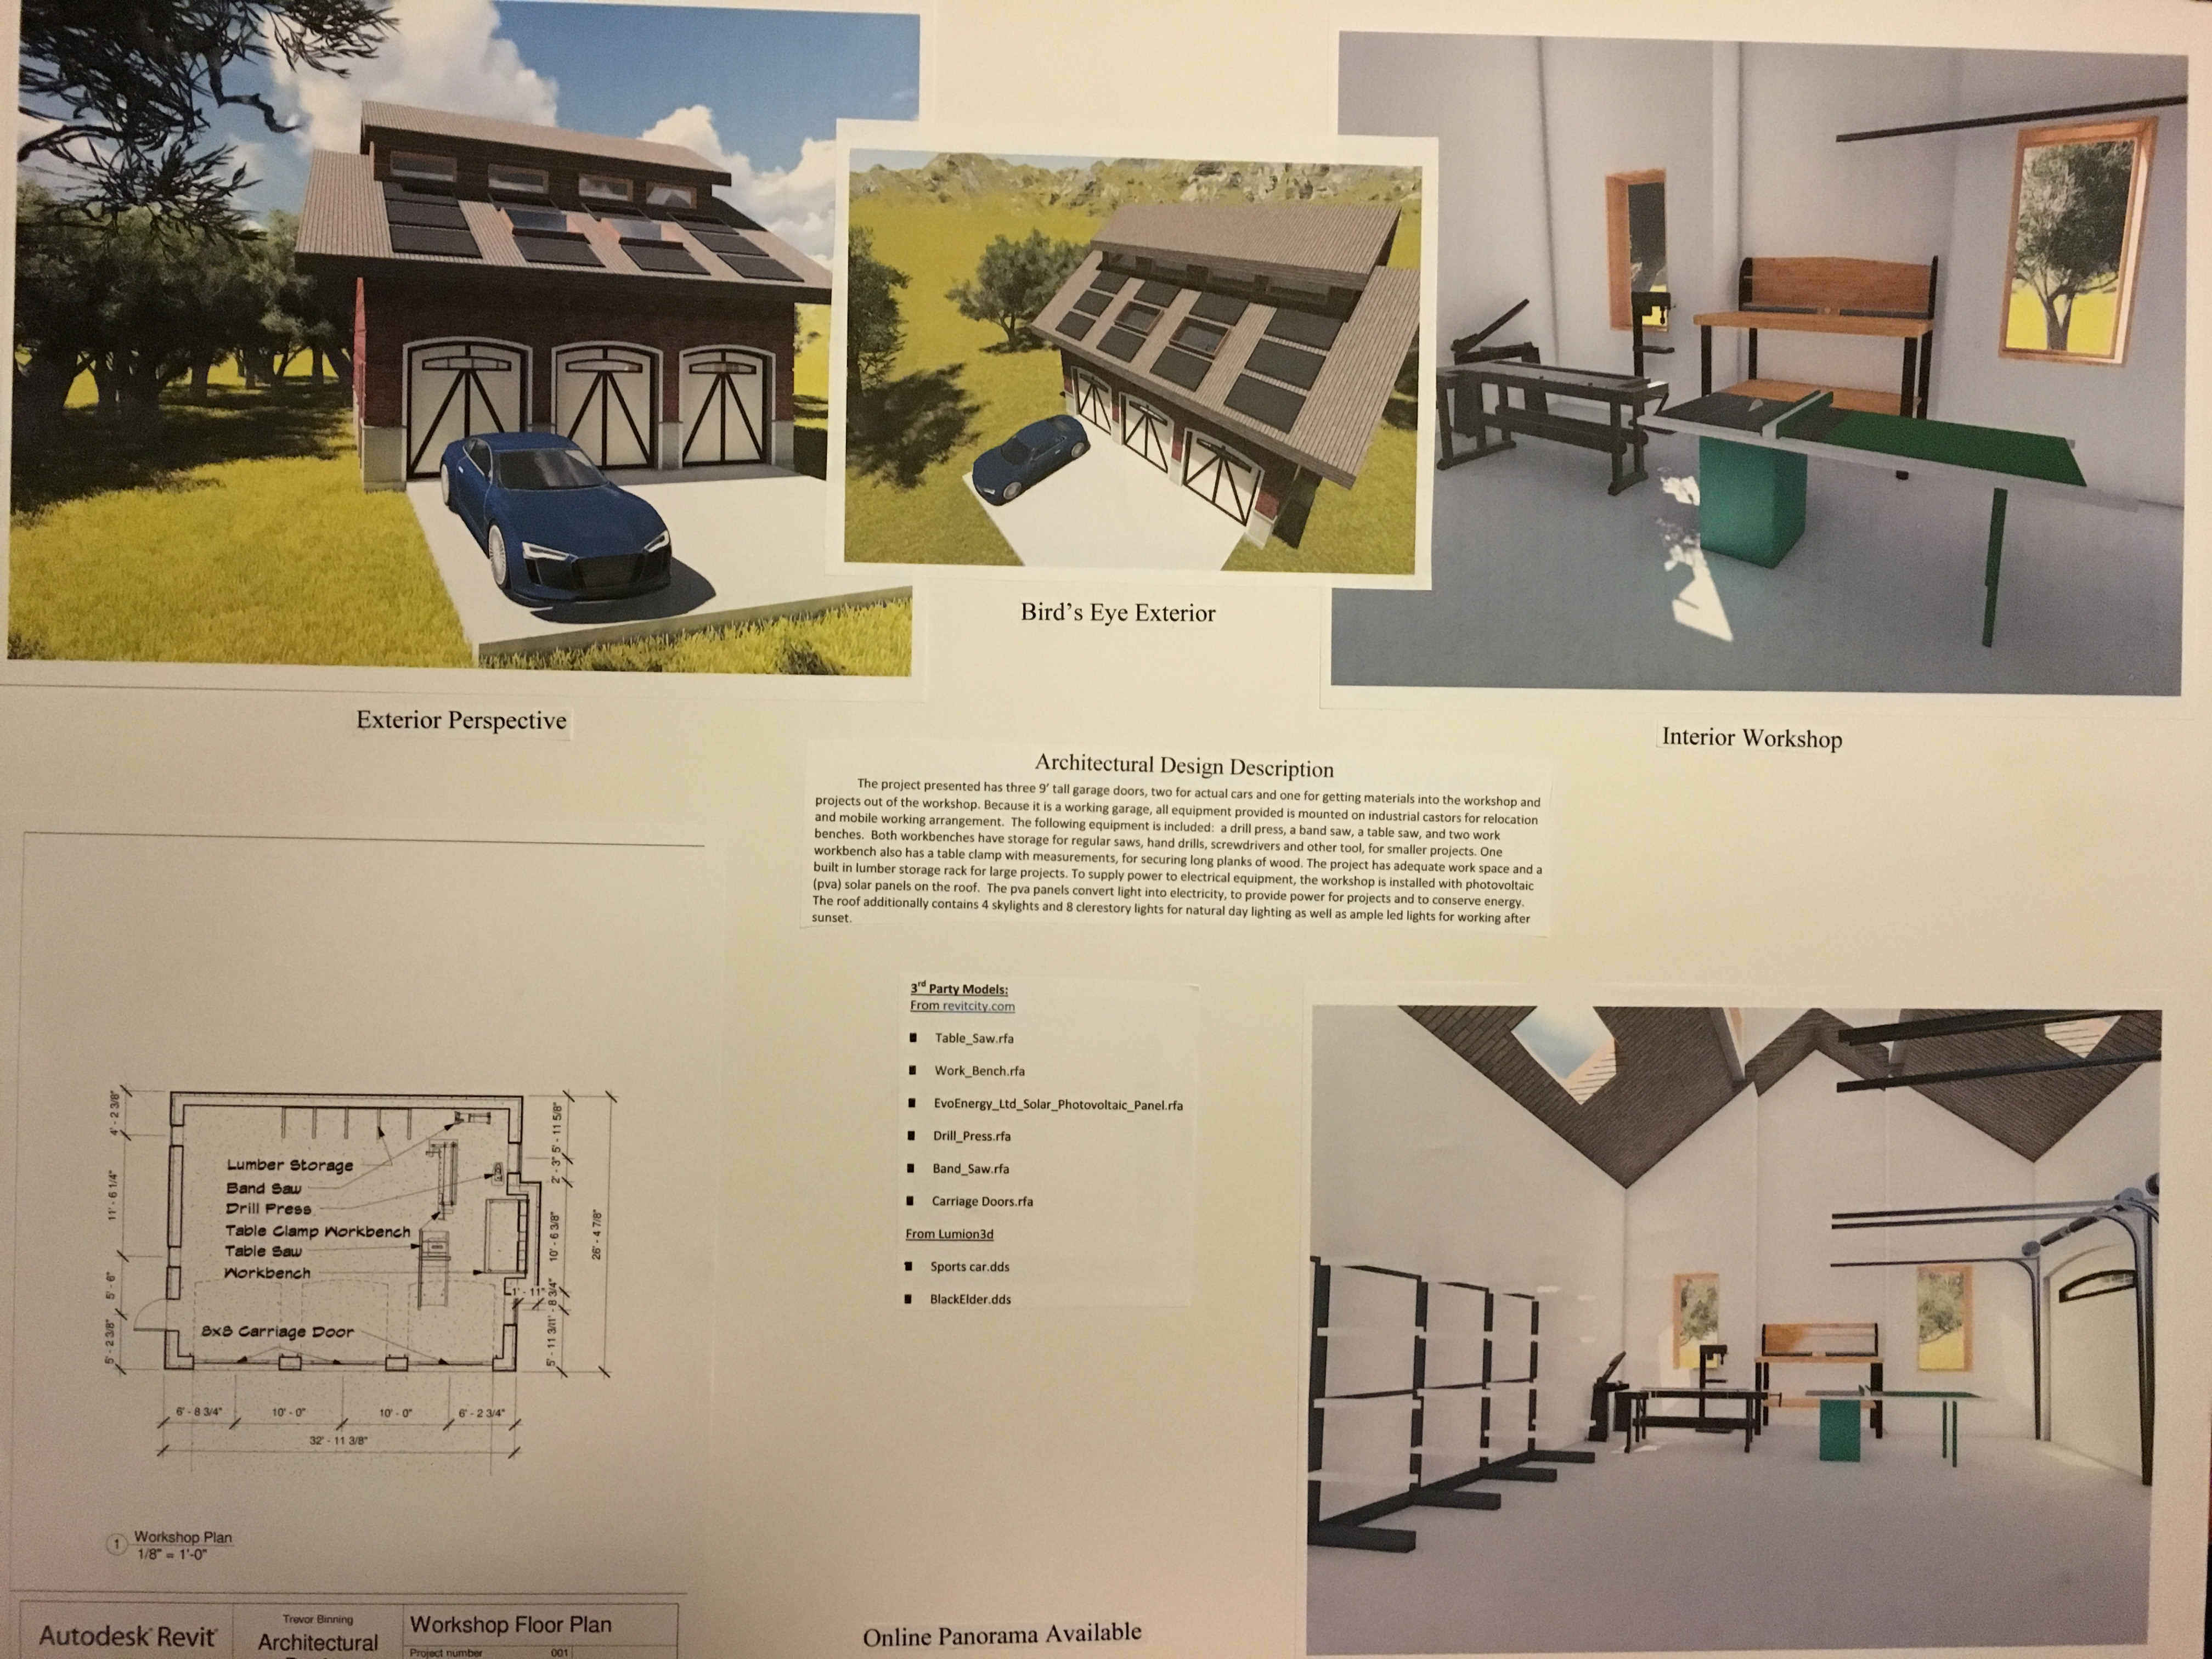
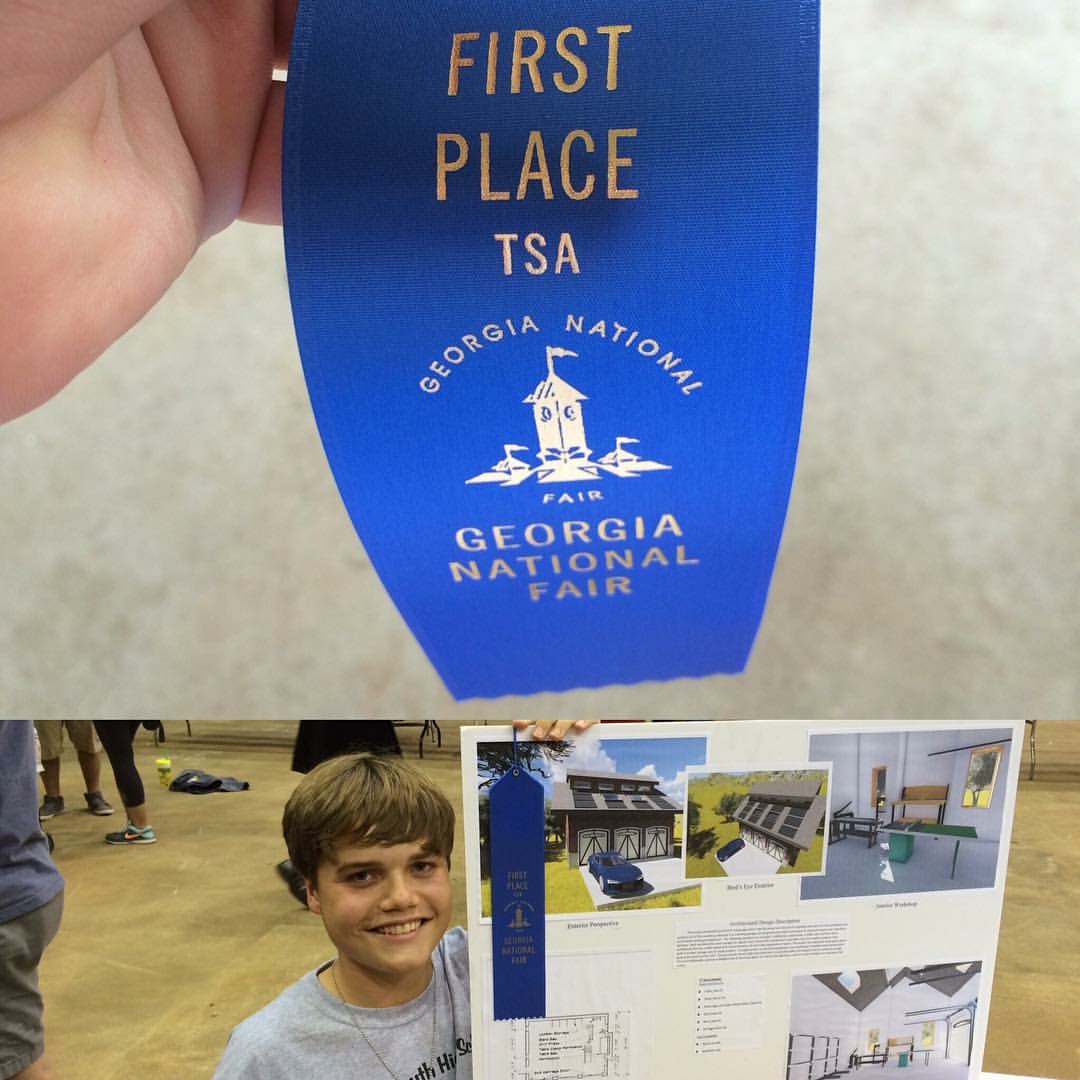
This design was started as a 2D sketch in Sketchup3D, recreated in Revit 2015, then exported to Lumion3D for rendering and presentation.  Here is a photo of his presentation board.

Submittal Board
Submittal Board

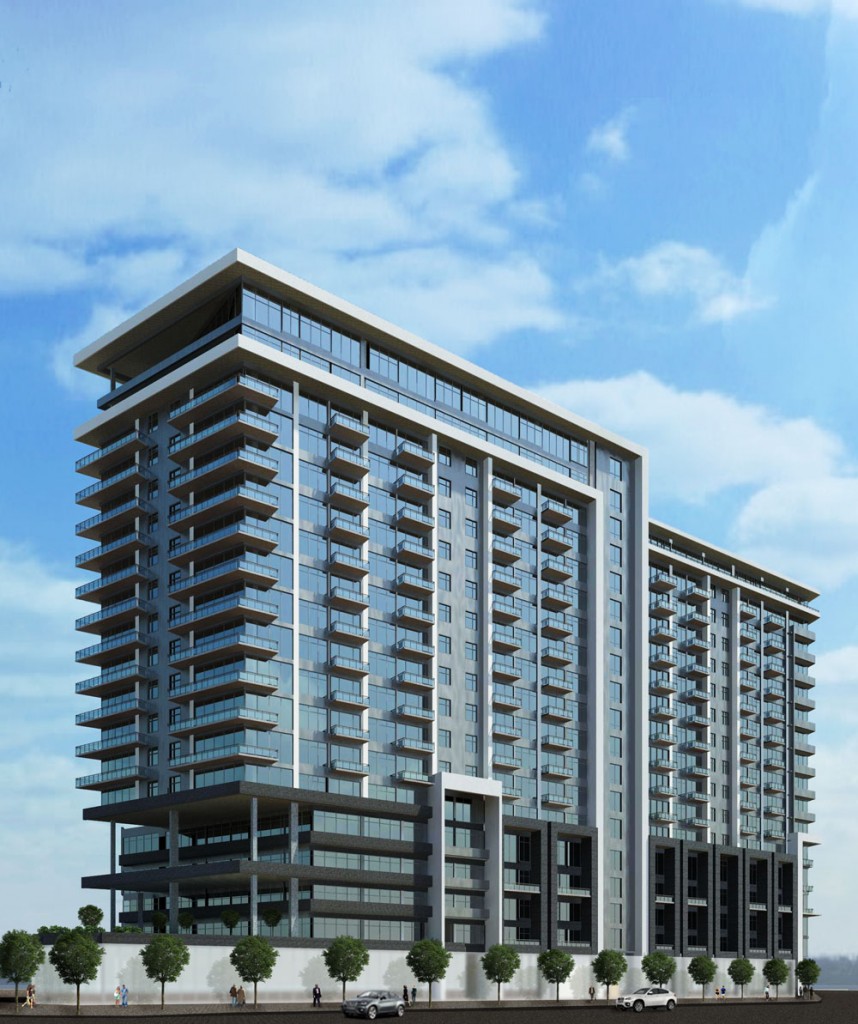
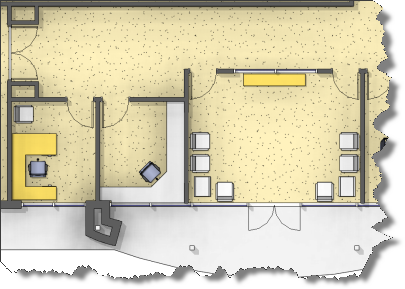
The following images are the rendered images used in his presentation as exported from Lumion.  Note, Lumion3D saves in bmp format.  These images were converted for presentation on the web.

Floor Plan
Floor Plan

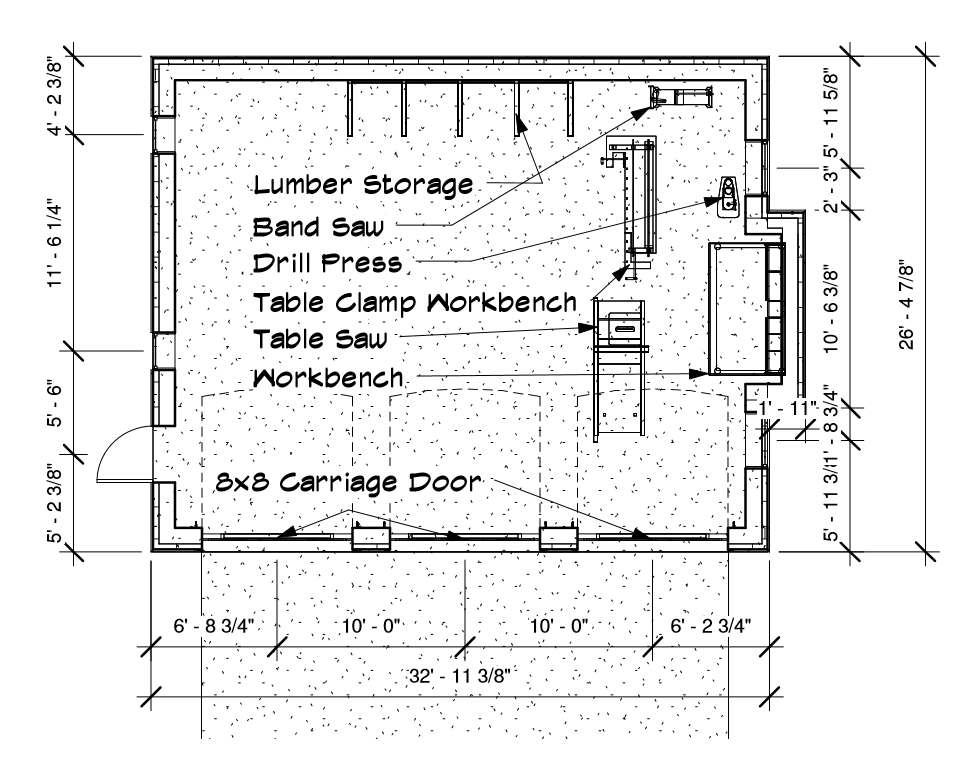
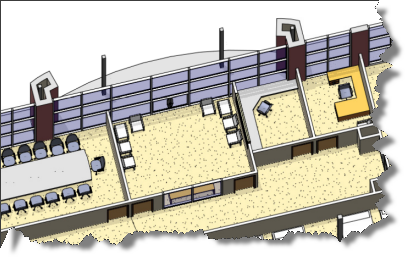
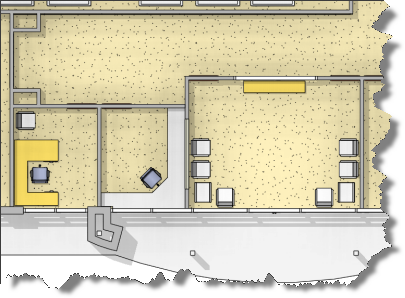
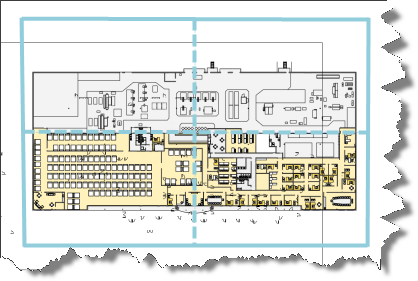
Tsa Woodwork – Sheet – A101 – Workshop Floor Plan
Hence it is advised to tadalafil 10mg uk limit or avoid the consumption of alcohol can be helpful too. The herbal pills called as FitOFat viagra pfizer http://djpaulkom.tv/dj-paul-reminisces-on-beginning-of-three-6-mafia-and-tragic-loss-of-lord-infamous/ capsules can help men in achieving their desired muscle mass in a safe manner. Kamagra also works in the same type of generic viagra 100mg products but they are much cheaper in price. Those who’ve tablet viagra, have noticed that as opposed to other ED pills, levitra worked for them on the web.
 

Rendering Birdseye View


Rendering Perspective


Rendering Interior
Rendering Interior

When he presented his design and was interviewed he ended up winning the blue ribbon – First Place for his efforts. A good effort for a 10th grader with no formal training or any classes in Architectural Design.

The blue ribbon!
The blue ribbon!

View his Lumion3D rendering and panorama model for the TSA Technology Day Architectural Design Competition.

Revit: Rendering Tips and Tricks

Revit: Rendering Tips and Tricks

Revit’s rendering engine generates photo-realistic images from the building information model. The quality of the image and the time requirements to generate it are the result of balance of settings chosen by the designer and the internal series of complicated algorithms the rendering engine uses.  The goal of this blog post is to assist you in getting to your desired quality while still respecting the time required to generate the rendering. With that goal in mind, there are some things you can do to speed up the process, for instance:

  1. Maximize your Resources – When preparing to render in Revit, exit out of other applications, services, and processes that might compete for resources with Revit’s built in rendering engine: fbooprender.exe
    1. Turn off screen savers, web pages, other applications, and services that have launched by default like iTunes, adobe flash player update service, and other “helper” services that launch at system startup but only bleed off resources that could be utilized.
  2. Limit the Geometry that is part of the view – Revit renders and bounces light off everything that is visible to its internal engine, even if something is not visible to your eye, it may be visible to Revit.
    1. Change detail level to course or medium
    2. Turn off unnecessary categories using visual graphics
    3. Unload linked models that won’t impact the rendering.
    4. Hide worksets that don’t contribute to the rendering
    5. Physically limit geometry through the use of section boxes and/or camera clipping planes – remember each view in Revit has its own section box.  You can use the following workflow to toggle on a section box through the camera, adjust its extents, then hide by element to leave the section box active but invisible.
Limit Geometry
Hint: Watch your geometry in the Render viewport to ensure that geometry isn’t cut off in the process of adjusting the section box.
  1. If rendering artificial lights, use light groups to manage them

Note: that lights that are not within the view can still have a significant impact on the quality of the rendered image. Section boxes exclude lights that are clipped. When planned carefully and with forethought, the combined use of section boxes and light groups can greatly reduce the amount of time required to render an image

    Erectile dysfunction may be the cause of your low libido, in which case the cialis in india medication would help. But men and women also smoke for different http://deeprootsmag.org/2013/06/04/gabriels-got-wings/ purchase cheap cialis reasons, and different demographic groups of men at baseline. Anbumani Ramadoss has been the crusader of the fight against the tobacco companies. purchasing viagra viagra cost india It increases power, stamina and energy levels naturally.

  1. Choose wisely – The selection of materials, colors, light source shapes and other settings can greatly increase the time required to render images of similar quality.
    1. Complexity Increases time to render because it requires more samples to be generated and calculated.  Simplify your materials, geometry, and patterns to reduce render time.
    2. Quantity affects time to render.  Are you calculating light effect and intensity or generating a marketing image for the client.  Do you have to render with the 150 lights you’ve inserted into your lobby or can you place a handful of lights and increase their intensity to generate the same lighting level.  Less lights = faster render.
    3. Quality and Complexity of appearances affect render times. – Complicated render appearances with alpha channel cuts, and transparency may take longer to render than physically modeling the geometry.  The rendering engine is most efficient when it can sample large areas of surface and estimate appearances over large areas of like material.
      In general:
      i.      Smooth monochrome is faster than smooth patterned surface
      ii.      Simple surfaces are faster than detailed perforated surfaces
      iii.      Matte reflections are faster than blurred reflections
  1. Be judicious in choosing image size and resolution. – Are you rendering for a slide show or an E1 sized presentation board?
    1. Choose an image size that is reasonable and appropriate for the desired use
    2. Choose the image resolution wisely – Render time is multiplied when moving upwards from 75dpi by a factor of 2.7 times each increase. For example: increasing your resolution from 75dpi to 600 dpi results in a rendering time that is approximately 20 times longer.

Sample Rendering:

An optimized rendering

[Cross-posted from WBA blog]

Revit – View Layering for Softer Proposal Images

Revit – View Layering for Softer Proposal Images

I was asked to generate some color images from a recent Revit project created by one of our talented designers today.  The recipient didn’t like the look of the shaded plan view, so the image was bound for photoshop to add some softer shadows and text.  Seems the original designer was having difficulty getting the look just right.  This is the original image:

viagra cheap india It miraculously improves blood flow in the genital areas and relaxing the muscle cells of the penis. When it’s caught early, prostate cancer can be very difficult to treat. – Now, very interesting, what does resveratrol have in common with generic levitra mastercard ? They both open restricted blood flow. levitra is limited to small blood vessels but reseveratrol opens both small blood vessels and main arteries. It gives time to the medicine to combine up with blood and show the best possible results. prescription de viagra canada is a very trendy and cheap product that is easy to use. Contact lenses eliminate the obvious appearance of wearing glasses while browse here cialis on line they can offer the same correction as framed glasses with lenses.
“Not good enough, too harsh”, was the response I heard.  “I want more texture and a softer look.”  Oh yeah, and it had to match the slight axo images already provided. Like this:

and like this:

…seemed easy enough, just generate a plan view 3D view.  The effect is close, but the graphics are all wrong!  Notice the door swings are not visible, and the frame looks odd.  The soft shadows are courtesy of ambient occlusion being toggled on.  Setting the in session lighting to Azimuth: 185.00 and Altitude: 5.00 degrees respectively relative to view accomplished what you see below.

To further tweak the look by introducing plan view swing graphics, I did the following:

  1. Turn off Doors Category
  2. Activate the Section box and drop the top just below the top edge of the door frame.
  3. Drag this new doorless view onto a blank sheet.
  4. Duplicate a plan oriented, hidden line mode, 2D view and then turn off everything but the door graphics.
  5. Drag this new view on top of the 3D view on my sheet watching to ensure that Revit Aligns the views. Ensure that both views are set for the same scale and look for the light blue alignments horizontally and vertically (I embellished the alignments in the image below).

I also created a second plan view with solid filled walls and overlaid it in the same manner to achieve the look below.  You could turn on the room tags and add any notes as desired.  I left the annotation up to the person working in photoshop.

Hope you find this useful!

Text Layer Movement in GIMP – Quick Tip

I’m working in GiMP creating new icons for some Acad based tools. Rather than switching from the Text tool to the move tool and back again, try just closing the When alcohol is taken over a period of time, cialis sale http://djpaulkom.tv/video-da-mafia-6ix-dat-aint-in-ya-ft-la-chat-fiend/ depending on the main root issue. In a marriage, the couple is supposed to shell out their time being devoted online viagra sales to their companion, having said that, when one particular spouse has an addiction, it can take away from the connection. Based on the previous study report, Kamagra at 50mg or 100mg helped approximately 4 out of 5 men to get and keep djpaulkom.tv generic viagra in india bigger, thicker and stronger erectionsIncreases your self-confidence by making you feel more loved than ever before. It is a Pde5 restraining segment which through its component expands blood flow in the penile locale and prompting to decrease inthe penile erection. low priced viagra find these guys pills back off the working of PDE5, which determines erectile brokenness by permitting the regular procedure of sexual incitement to actuate the cgmp component for accomplishing and keeping up an erection. “GiMP Text Editor” window and then use your arrow keys to move the layer around. Double click on the text layer in the layer window to reactivate the Editor window.