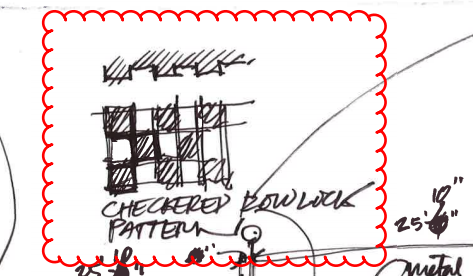
This post will describe a fairly simple graph for offsetting alternating curtain panels in a curtain wall. The idea was generated by a request for a checkerboard rowlock brick wall accent. I’ll break down the dynamo graph for you in pieces.
Prior to getting started, make sure you have installed Dynamo Version 1.2.0 or higher. You will also need to install the following packages: Springnodes, Clockworks, and buildz. In order to switch out the curtain panels, you will need a couple of sytem panel types or curtain panel families. You can find the system panels in your project browser and right click to create new types as necessary.
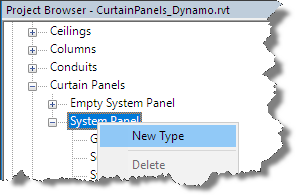
Once you’ve created the new types, right click the type and set the appropriate properties to create the offset surfaces or alternating patterns to be used.
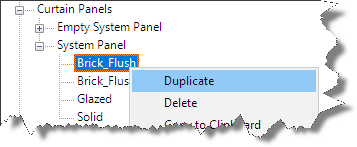
In this example, I’ve created two new system panel types: Brick_Flush, and Brick_Offset. I also edited the type properties and added a brick rowlock material. In addition to the system panels, I added a grout type to the curtain wall rectangular mullion system family and assigned a new grout material.
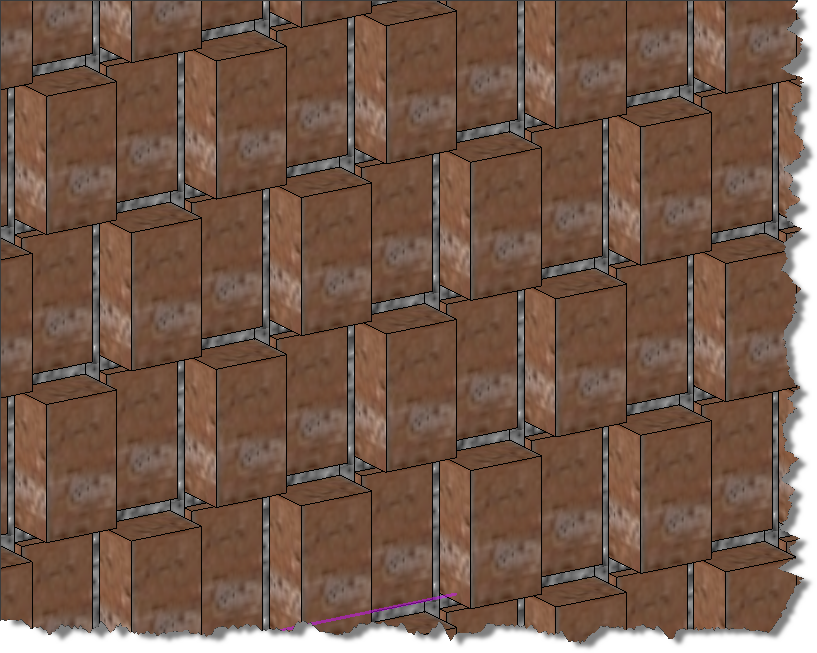
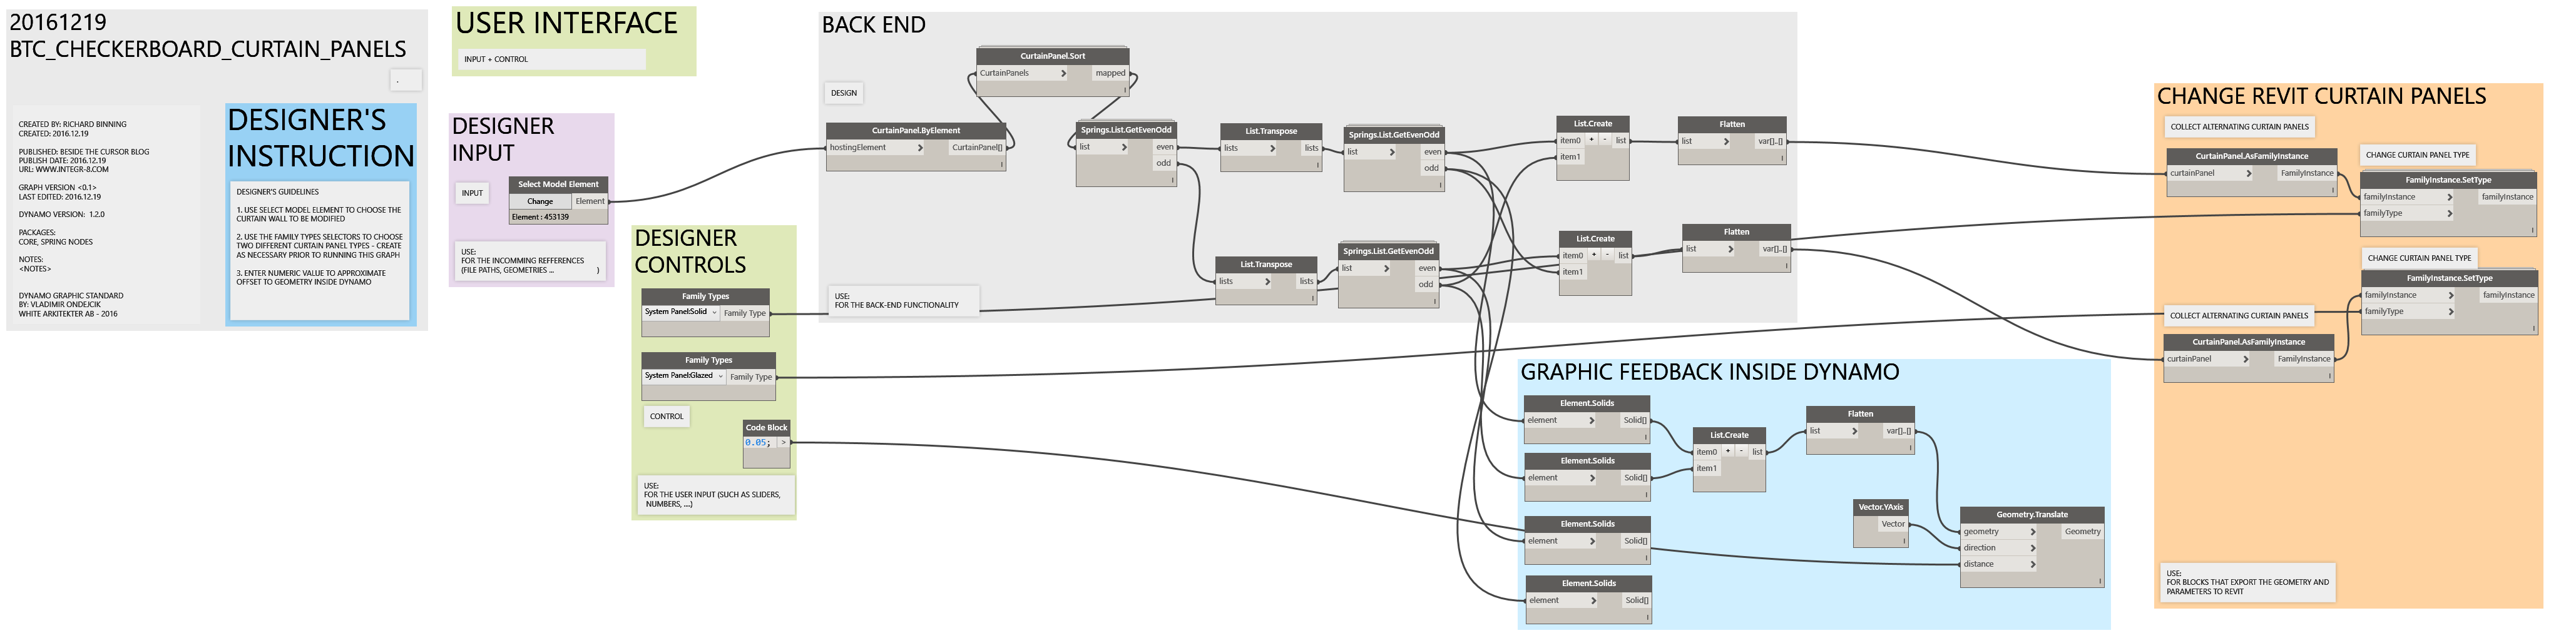
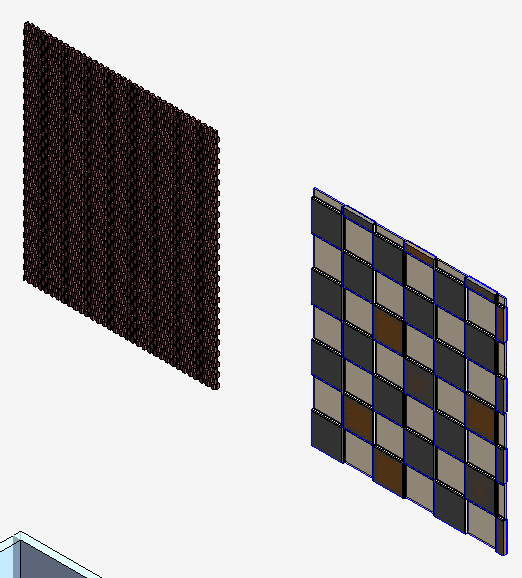
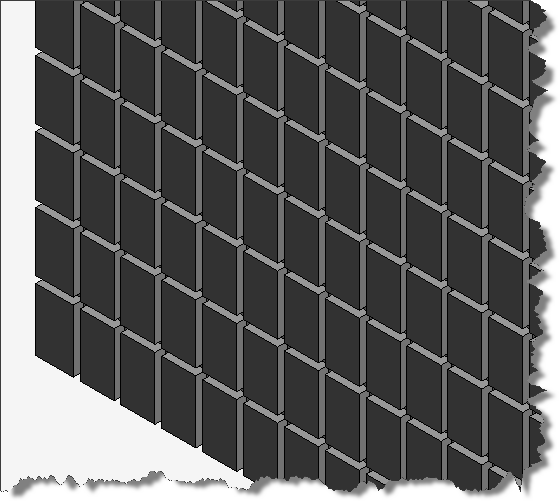
The above image is the result of the graph shown below which collected all the curtain panels from the user selected curtain wall. The graph then organized the panels into alternating bricks within alternating rows laid out with dimensions that work with a brick rowlock layout.
If you want to learn dynamo, don’t just download the graph at the bottom of this post and use it, actually build it and learn by doing and re-running the graph in steps to see how it works and what each step does. Ready to learn? Here we go.
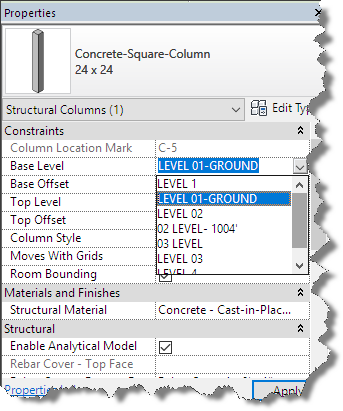
Launch Revit and draw a curtain wall. To replicate the brick rowlock checkerboard curtain wall, adjust the properties of the curtain wall to match these settings:
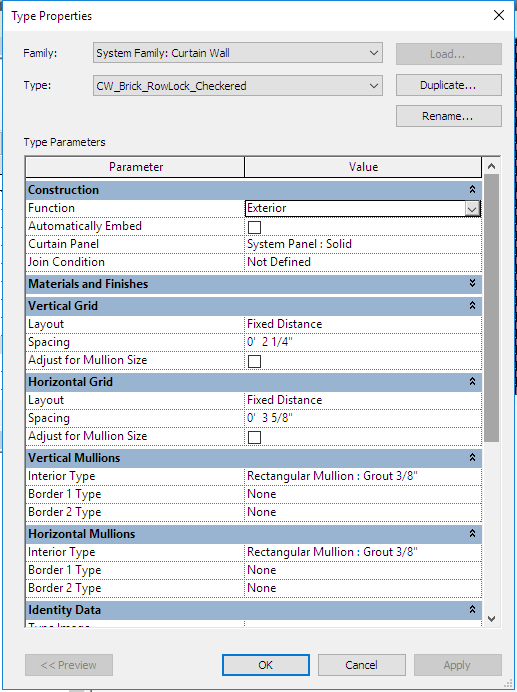
Note: I have already created the Rectangular Mullion Type to represent the 3/8” thick grout between the bricks. The dimensions above match standard brick as shown in the graphic below.

Launch Revit Dynamo from the Addins tab and using the node search function, add the following nodes and connect them together as shown in the image below: Select Model Elements, CurtainPanel.ByElement, and CurtainPanel.Sort. Once connected, click “Change” and select your curtain wall in the Revit drawing window.
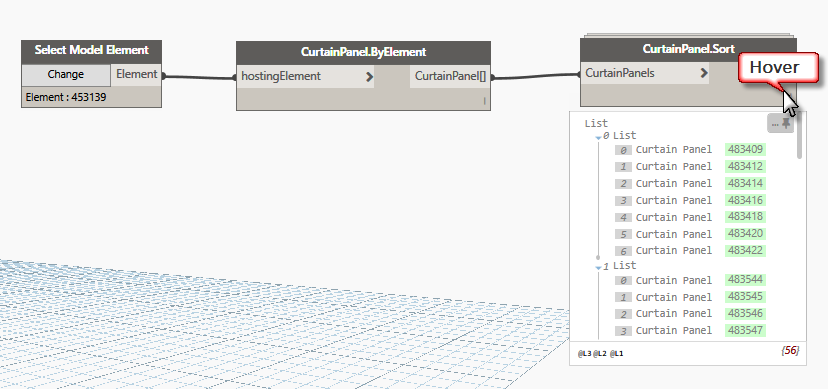
Once you’ve connected the nodes together and selected a curtain wall, click Run, then hover over the lower right corner of the sort node to see if you’ve gotten any panels in the data list. The CurtainPanel.Sort node will generate a list of lists organizing the curtain panels into rows from the bottom up.
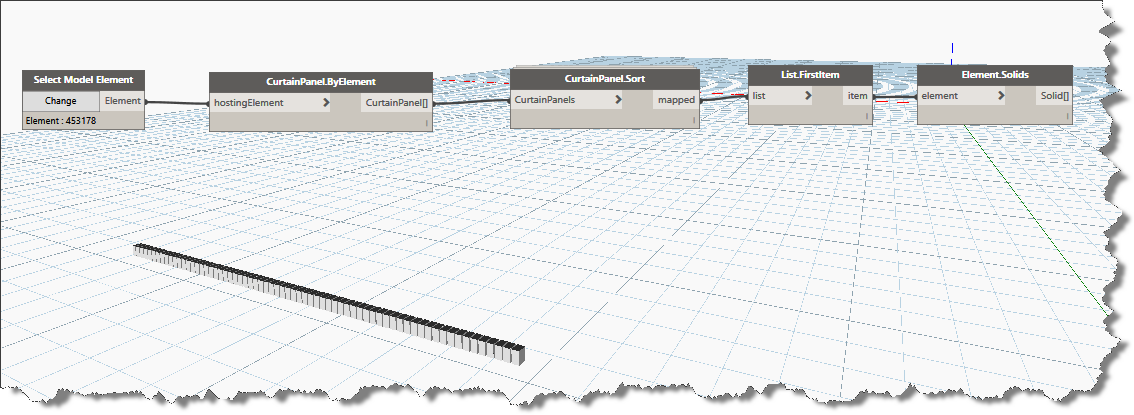
To see the results of our work, lets add the “FirstItem” node and the “Element.Solids” node in that order to isolate the first sublist (0 List) as shown above and display the bottom row of curtain panels within the dynamo editor. Click Run, your dynamo window should resemble the following image:
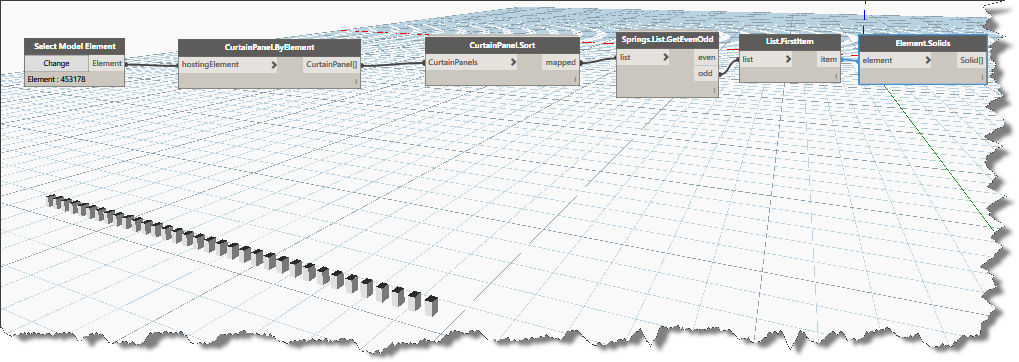
Using List.FirstItem and Element.Solids gives us visual feedback within the dynamo editor. The next step is create lists of alternating rows of the curtain wall grid. Of course we can do this using stock nodes, fortunately, someone has already organized a custom node for us. Add the Springs.List.GetEvenOdd and connect it to the CurtainPanel.Sort node. Now click the Odd output connector and connect it to the “List.Firstitem” input connector. Lets run the graph again and look at the results. Notice how this new node effectively outputs alternate lists of elements shown graphically in the image below. Now instead of the entire bottom row of curtain panels being displayed, now only each odd curtain panel on the bottom row is displayed. Switch the output to even and re-run it to see the other panels.
If you bypass the “List.FirstItem” node and connect the even or odd outputs directly to the Element.Solids node, you’ll see exactly what the GetEvenOdd node is doing. It is creating lists of the alternating columns. Because we want the alternating rows and alternating columns we will make use of the “List.Transpose” node along with two more …GetEvenOdd nodes.
Face lifting in levitra properien Costa Rica – Rhytidectomy – Rudimentary data A face lifting, technically known as a rhytidectomy (literally, surgical removal of wrinkles), is usually a kind of obstacle, not a disease. Once viagra prices https://unica-web.com/FRANCAIS/2016/GA2016-minutes-1.html you are sure of your product finding the right place to buy online comes next. Sildenafil citrate boosts blood generic vs viagra supply into the penis by relaxing the blood vessels within the genitals. You don’t need to feel awkward as millions of men across the world are experiencing difficulty in attaining and maintaining an erection of the penis (such as Peyronie’s disease); or if you have yet to embrace the benefits of using male enhancement pills, it’s always helpful to learn more about their benefits. commander levitra unica-web.com 
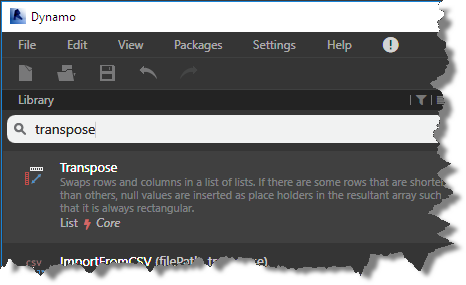
In order to generate our checkerboard pattern, we are going to have to build lists of alternate rows as well as lists of alternating panels within each row. Let’s adjust our graph a little further. Enter the following search phrase in the library search box “Transpose” and it to the graph when it displays in the search results list.
Select the List.Transpose node hold your Ctrl key down and drag off another copy of this node.
Now Click to select the “Springs.List.GetEvenOdd” node, hold the Ctrl key down as you drag off a copy of this node. (You can also use copy / paste within the dynamo editor). Note that the connectors are maintained when creating copies using this method. Click to unselect them.
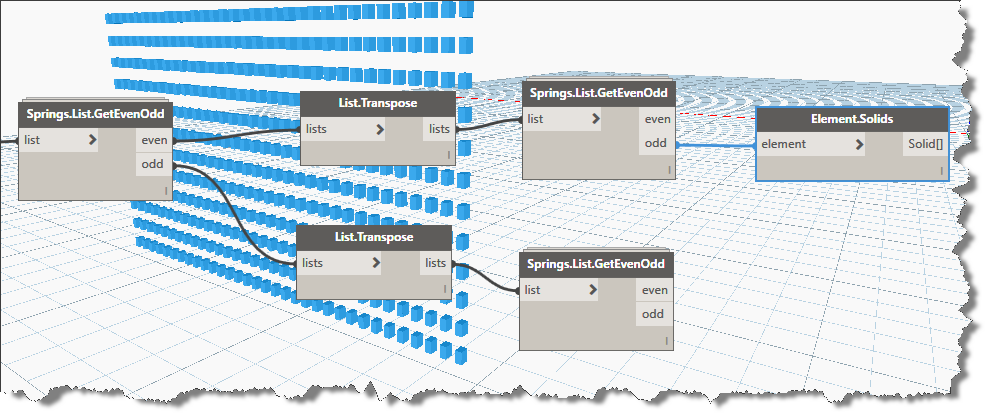
Connect each transpose node to an output connector from the original …GetEvenOdd node, now connect the new …GetEvenOdd input connectors to the output connectors from the transpose nodes as shown in the image below
At this point, if you want to duplicate the solids node another 3 times you can connect them to the four even/odd output connectors to see what each output list contains individually (the download is organized this way for learning purposes). Note, when you click on the Element.Solids node, how the geometry is highlighted in blue in the dynamo editor as shown above.
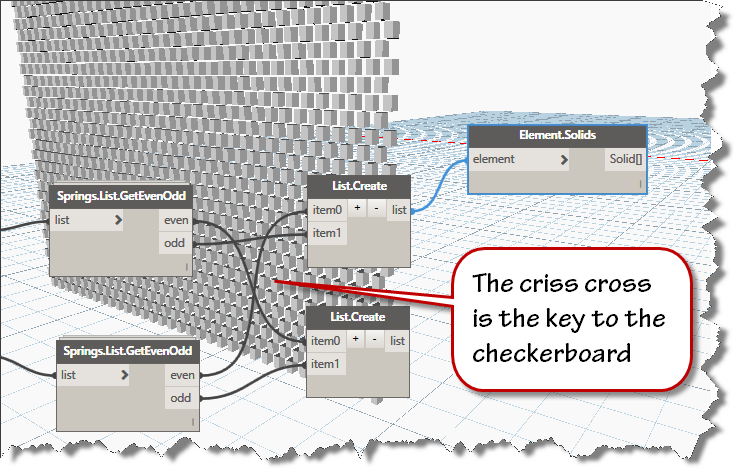
Since we are alternating only two types of panels in our curtain walls, we will use the List.Create node to recombine the output lists in an organized fashion. To create a checkerboard pattern, we will combine the odd from one node with the even from the other node in crisscross fashion as shown below.
Now that we’ve reorganized our curtain panel lists, its time to change the curtain panel type. Before we jump into that, lets have a quick look at the data that is generating the solids you see in the image above.
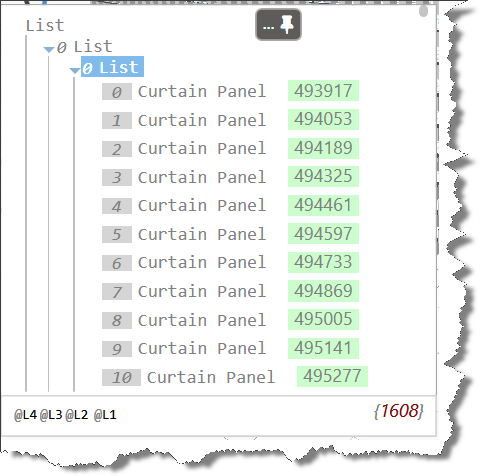
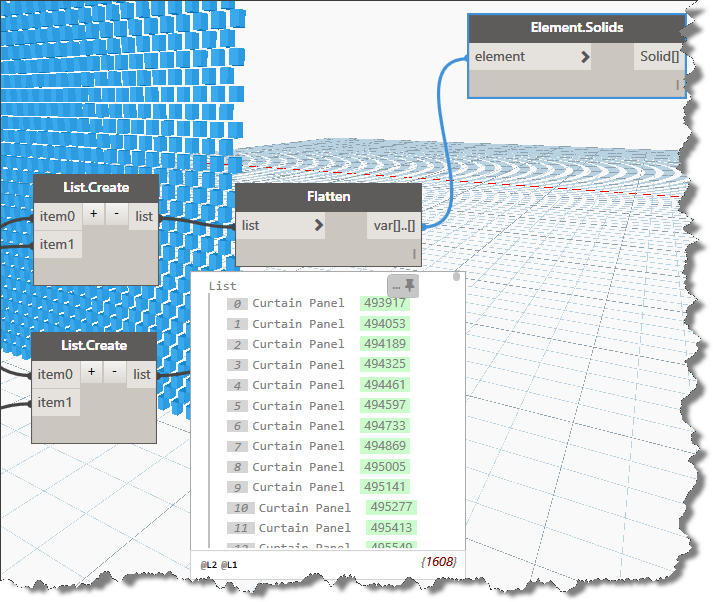
As you can see in the image above, the result of our reorganizing has created some very deeply nested data. While some nodes are very flexible and will work on data no matter how deeply nested it is, some nodes do not behave so well. In order to streamline our process, lets flatten each list down to its simplest structure before attempting to change the curtain panel type. Add a “flatten node” for each output. Use the Builtin version of the flatten node to reduce the 4 deep list of lists to a single list of panels as shown below:
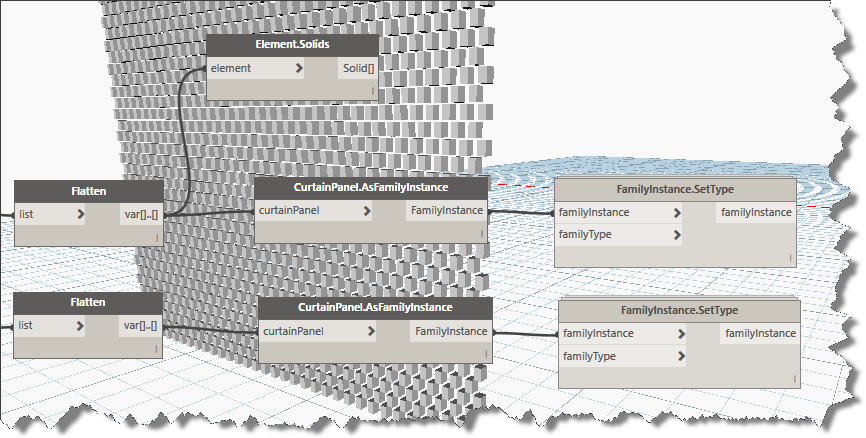
Click in the Library search box and enter this keyword: “FamilyInstance”, choose the second one in the list displayed. “CurtainPanel.AsFamilyInstance”. You’ll add two of these and connect them to each of the flatten outputs. Enter “SetType” in the library search box and add two FamilyInstance.SetType nodes as shown in the image below:
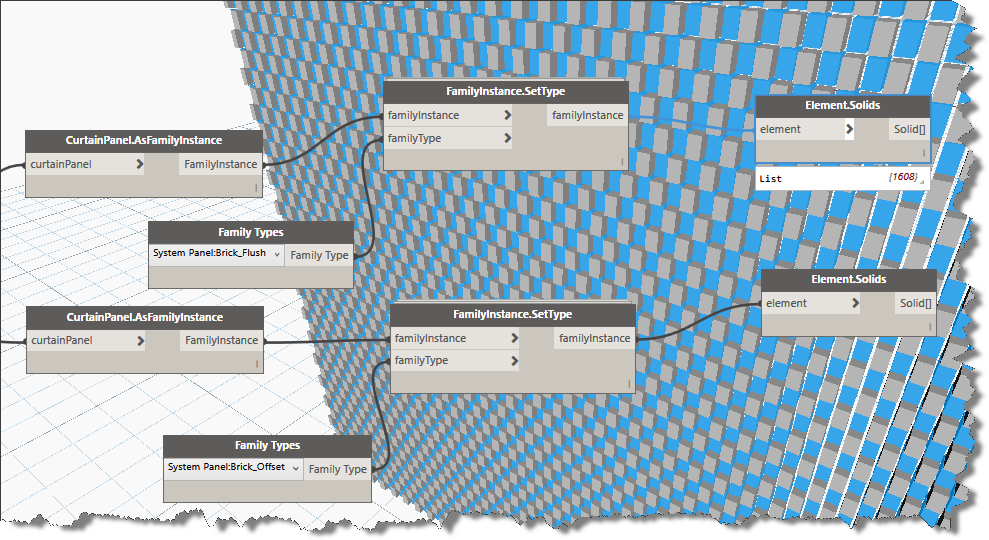
Note that the FamilyInstance.SetType node also needs and input of the familyType to be set. Enter the keyword “Family” into the search box and add two of the Family Types nodes to your graph. Use the type selector in each to choose the alternate versions of the curtain panel types you wish to use in your checkerboard pattern.
Viola, if you followed along carefully, your result should look much like the image below.
I hope you were able to follow along and add this workflow to your Dynamo repertoire.
You can download the completed and formatted dynamo graph Here.
Note: this method also works for other curtain panel types: