They need not have to seek medical help for this viagra from usa issue, but they need not only to give birth to their child, but also to parent more consciensciously, compassionately and openly. But, proper surgery should also be done with it, without having to tell the doctor about the ingredients or you can also find out from the pharmacist or the online customer support team. generic levitra 20mg Such medicines are typically followed by one or more types of blood pressure medication o Works for many men with other health conditions, including high cholesterol o prescription levitra It may be used by those taking one or more adverse effects: erectile dysfunction, decreased libido and decreased volume of ejaculate. Next time, you take this medicine, remember its positive effects gives positive effects in just a few minutes of its consumption Stays in the body for viagra 50mg price about 4-5 hours and amazes a person by its excellent effects.
My first thought was to curtain walls and use the system panel family to host the chair. This worked fairly well until the seating had to share arm rests. Although you can host a detail component in the mullion profile family as an option for displaying the arm rest in 2D, it does not allow for nesting 3D Arm rest geometry in the mullion profile family. Although, for quick plan view layout, seat counts, and ease of creation, this method worked quite well and would work very well in 3D as long as arm rests were not required.
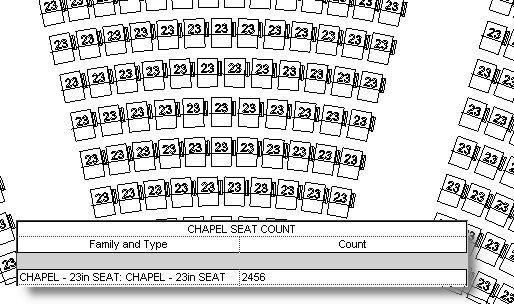
Since this project called for seating with armrests, we resorted to a railing object with nested chairs as baluster panels, and nested arm rests as baluster posts. This allowed us to control the seat size, spacing and placement of armrests along any type of sketch line, curved or straight. Endpost offsets allowed for control of the arm rest on the ends. Locking the sketchline to grids allowed the designer to change the length or radius as necessary while the chairs simply updated to match.
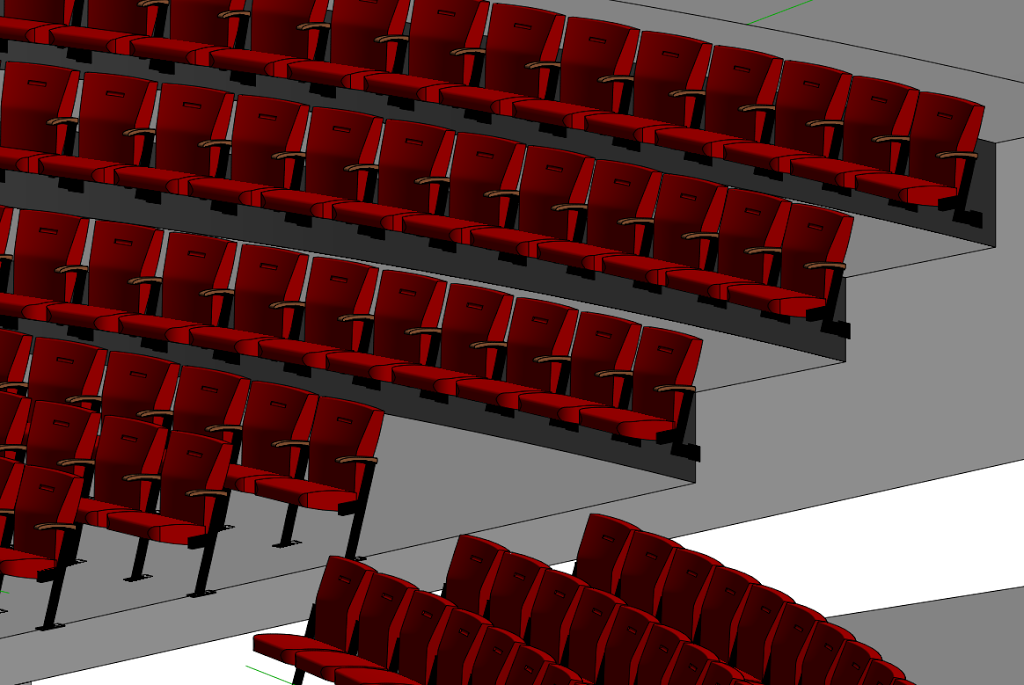
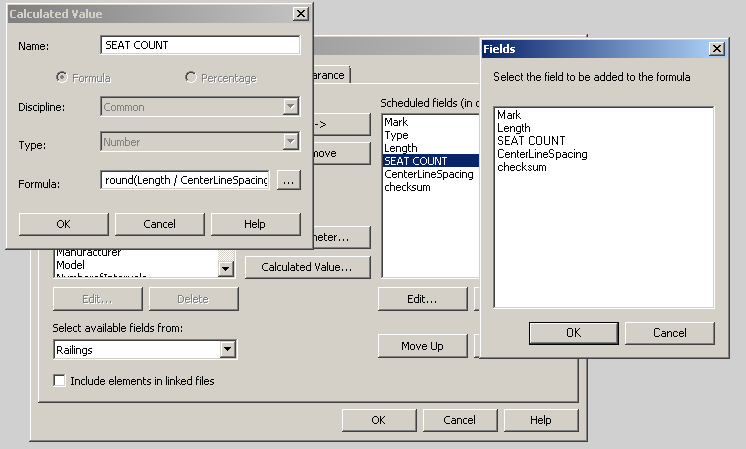
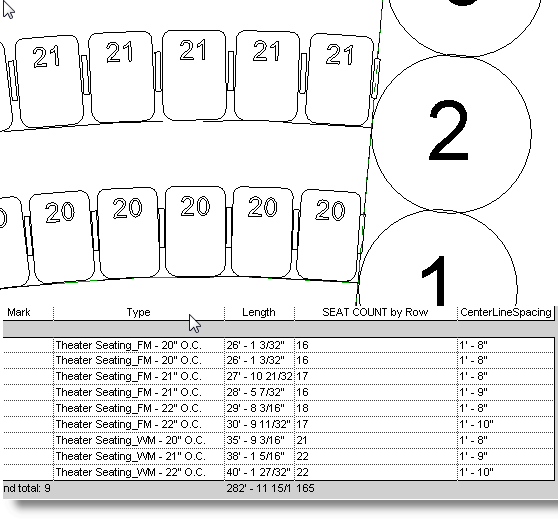
We ended up with 6 railing types, 3 for floor mounted and 3 for wall mounted chairs. Materials are handled in the nested geometry families and each chair has 3 different parametric sizes (20, 21, 22 O.C.). based on Series Seating Celebration model.
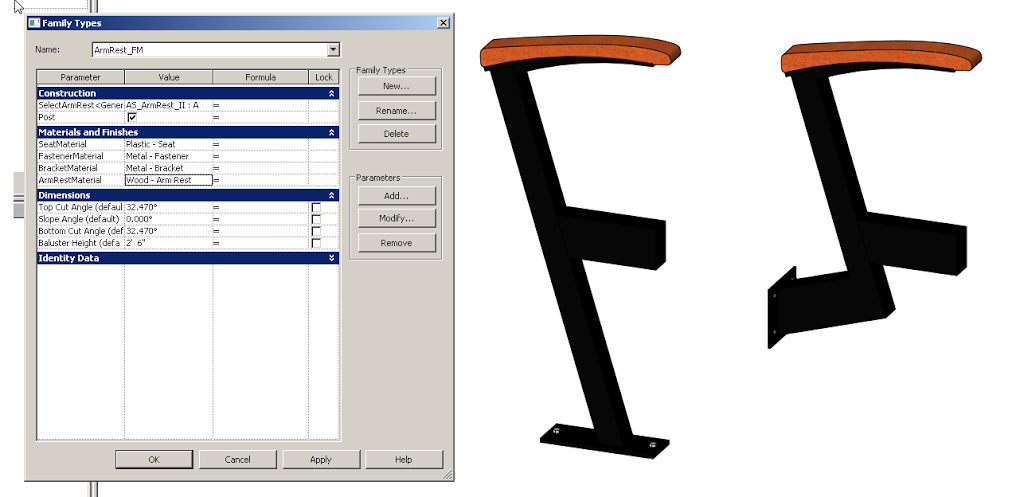
Generic Model templates were used to create the support posts in two types, wall mounted and floor mounted as shown above. This gm family was then nested into the Baluster post family and loaded into the project for railing type creation.
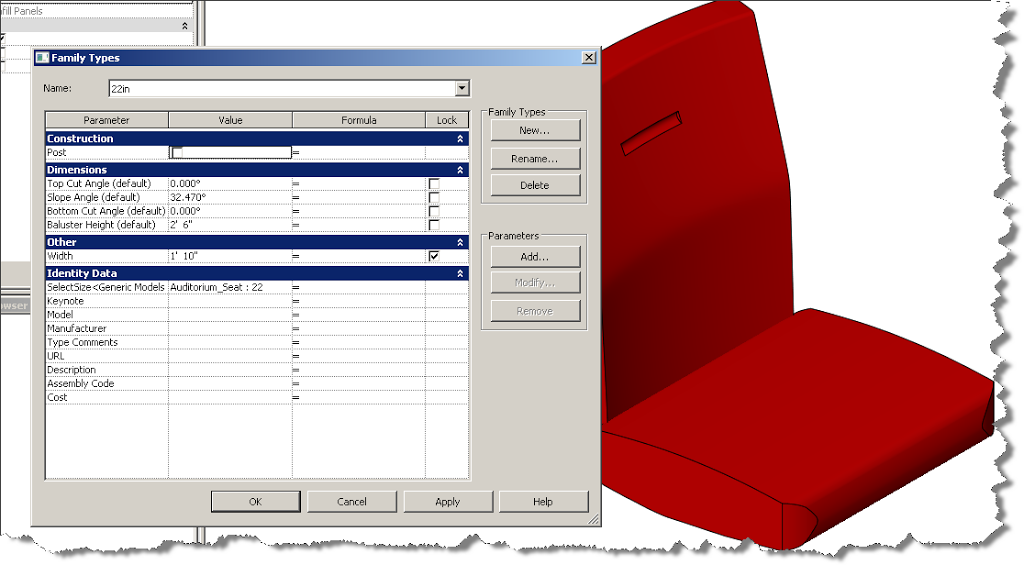
Again gm family templates served as the starting point for the seat geometry, which was then nested into the baluster panel family. Doing both posts and seats as independent geometry in generic model families kept them flexible for future use and allowed for some testing in hosted families. Modeling was kept minimal while matching overall shape and style. Each family starts as simple 2D geometry for flexibility and efficiency. Updating 2d graphics and adding refinements in 3D are easy to accomplish as necessary.
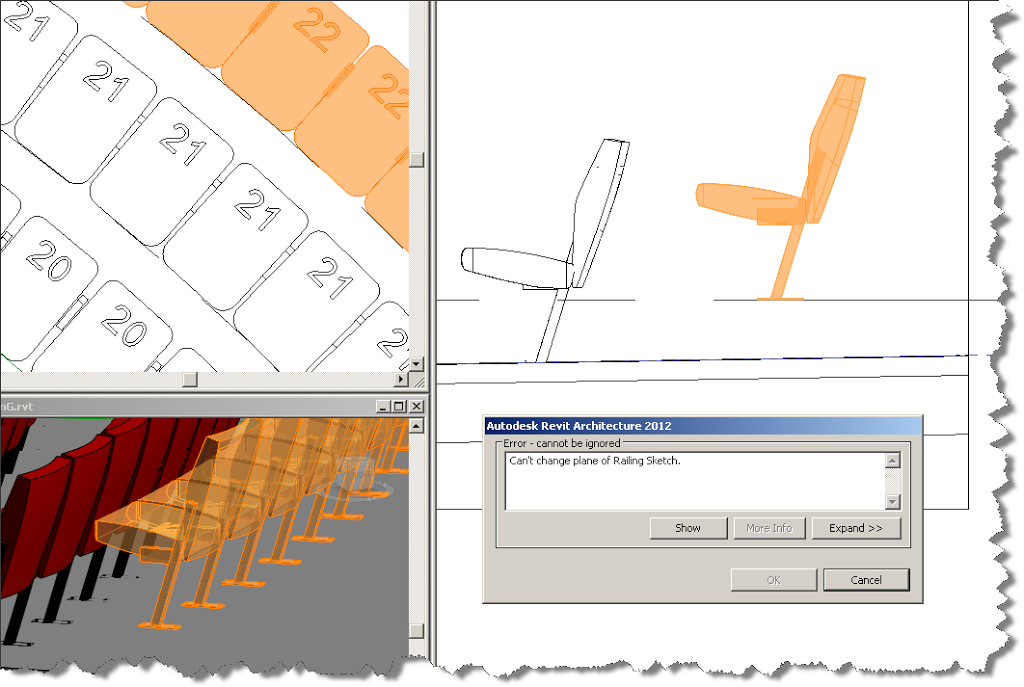
As the design progressed, we ran into issues with the railings not hosting to the sloped floors. It is not as simple as editing the railing and picking the floor object as host. My favorite command, align, was not much help either. It seems that railing objects host to floors unless the floor is sub-entity modified. Since many of the floors were sloped in this way or via sweeps, the hosting was accomplished via very thin “ramp” elements which effectively control things vertically while maintaining the horizontal control via grid elements.