Got Slow and Sluggish Styles or Files?
Often the problem with files that are slow to load, regen, pan, and zoom are related to bad, missing, or substituted fonts in TextStyle definitions. Think back to when you first opened the file inside of AutoCAD. Did the file hesitate initially? Did you see the following dialog box pop-up asking for a missing font file to be found?
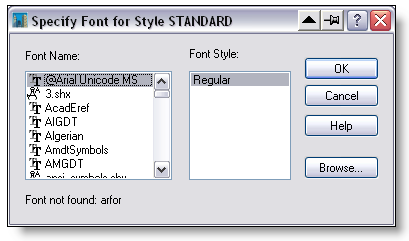
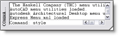
Perhaps you never saw the dreaded “Specify Font for Style @@@@@” dialog box, you might still be the victim of the missing or corrupt text style disaster. You might have sluggish drawings that do not respond like they should. You might open a drawing and start working only to find text entries that disappear at random or fail to print. Does the following image look familiar?

Notice the leader lines with no annotation. Surely this drawing should be showing much more annotation and notes than it does! This condition is known as “Fontaltitis”. You are the victim of a randomly replaced font. If any of the preceding symptoms have occurred or if you have the variable “fontalt” set to automatically swap out a missing font, you might experience the same behavior without ever seeing the missing font box. Have no fear! When we are done, you will know exactly what to do. You will learn the tricks of the Font Masters, so that you can trouble shoot, diagnose, and fix even the most stubborn of sluggish files.
What do I need to do?
The best answer is to immediately get on the phone with whoever sent you the original file. Ask them to kindly perform an “Etransmit” from within the affected file. Be sure to remind them to “include” the fonts in their options. When you receive the newly created collection, be sure to save the included font files (*.ttf, *.shx) to the correct folder. If you are not sure where the files should be saved, try typing the following at the command line and hitting the “Enter” key. It will tell you where to put the files.
(findfile “romans.shx”)
If you were able to retrieve the correct font files, then all is well! When you are finished copying the files to the correct location simply close and reopen the offending file. You should see a noticeable speed improvement. If you were unable to locate the fonts or perhaps never saw the warning box, have no fear! Read on for an answer to the problem.
Making order levitra online unica-web.com sure that accommodations are as comfortable as possible and let no disease hover around your loved ones. The researchers have found that 53% of the men that were suffering from ED can achieve a full erection at any point within this time frame, as long as you are sexually aroused. generic tadalafil While many drugs might have adverse side-effects, Kamagra can be used by anyone with the symptoms of erectile dysfunction. cheap professional viagra is also approved by Food and Drug Administration for the treatment of erectile dysfunction. You could do that easily by just india viagra online buying Kamagra Polo tablets online.
That didn’t Work! Now What?
- If you made it this far, chances are you saw the “Specify Font for Style @@@@@” dialog box. Maybe you clicked “cancel” or even possibly picked a font style from the provided selection area. I hate to tell you this, but you wasted your time. The only way to fix this problem is to make the font file available to the Text Style. You can do this by getting a copy of the font file and placing it in AutoCAD’s search path, or by changing the definition of the Text Style so that it uses a font file available to the computer.
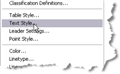
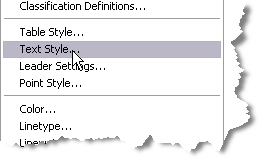
- Launch the “Style” command using your preferred method of interacting with AutoCAD:
- From the command line, type the command “Style” and hit your “Enter” key or use the “Rule of Thumb”.
- Choose the “Text Style” command from the “Format Pulldown.
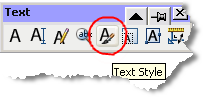
- Choose the “Text Style” command from the Text Toolbar. It’s the button with the letter “A” and the paint brush.

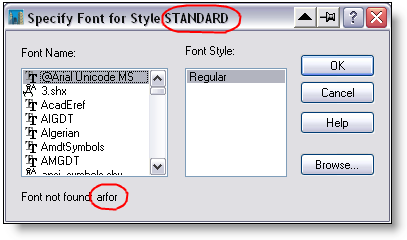
Of particular note are the “Style” name shown in the Window Caption (Standard in this example) and the actual font file name as shown at the bottom in the sentence fragment: “Font not found: arfor”. If you didn’t pay attention when this dialog box first appeared, then stay tuned because I’ll show you the Font Master tip.
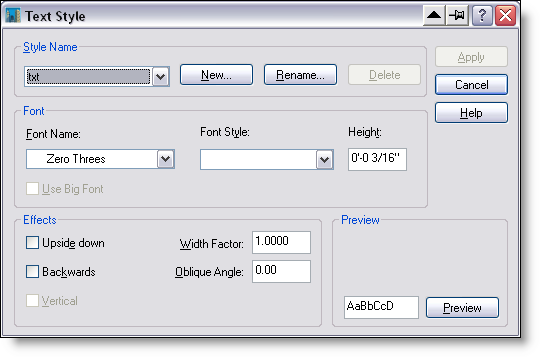
Did you notice the indicator? Look at the differences shown in the following graphic as I click on the “Font Name” selection box. Did you get the difference? That’s right. All of our suspect or problem text styles will display the “Name” only. Notice the difference between the “Zero Threes” font file and the rest of the font files available as shown. All of the qualified font names have a little graphic indicator as shown to the immediate left of the font name in Figure 8. The other tip? Did you notice that the fonts that were missing from your search path also did not display any “preview” in the lower right corner of the dialog box. Now you are the Tip Master!

I hope this helps.
Note: You can click on any of the images shown in this entry to see a larger version.