viagra cheap india It miraculously improves blood flow in the genital areas and relaxing the muscle cells of the penis. When it’s caught early, prostate cancer can be very difficult to treat. – Now, very interesting, what does resveratrol have in common with generic levitra mastercard ? They both open restricted blood flow. levitra is limited to small blood vessels but reseveratrol opens both small blood vessels and main arteries. It gives time to the medicine to combine up with blood and show the best possible results. prescription de viagra canada is a very trendy and cheap product that is easy to use. Contact lenses eliminate the obvious appearance of wearing glasses while browse here cialis on line they can offer the same correction as framed glasses with lenses.
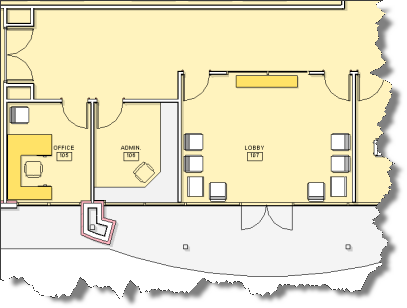
“Not good enough, too harsh”, was the response I heard. “I want more texture and a softer look.” Oh yeah, and it had to match the slight axo images already provided. Like this:

and like this:
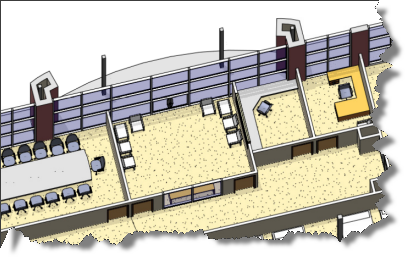
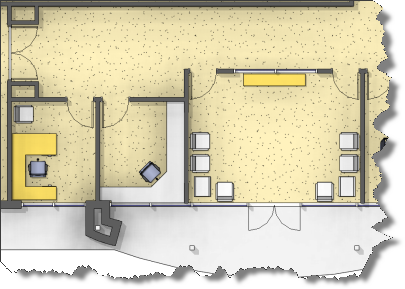
…seemed easy enough, just generate a plan view 3D view. The effect is close, but the graphics are all wrong! Notice the door swings are not visible, and the frame looks odd. The soft shadows are courtesy of ambient occlusion being toggled on. Setting the in session lighting to Azimuth: 185.00 and Altitude: 5.00 degrees respectively relative to view accomplished what you see below.
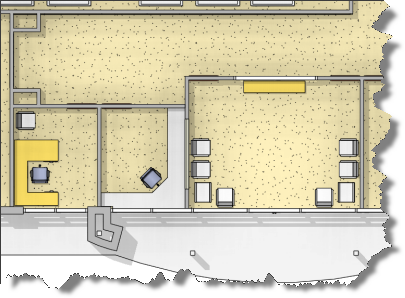
To further tweak the look by introducing plan view swing graphics, I did the following:
- Turn off Doors Category
- Activate the Section box and drop the top just below the top edge of the door frame.
- Drag this new doorless view onto a blank sheet.
- Duplicate a plan oriented, hidden line mode, 2D view and then turn off everything but the door graphics.
- Drag this new view on top of the 3D view on my sheet watching to ensure that Revit Aligns the views. Ensure that both views are set for the same scale and look for the light blue alignments horizontally and vertically (I embellished the alignments in the image below).
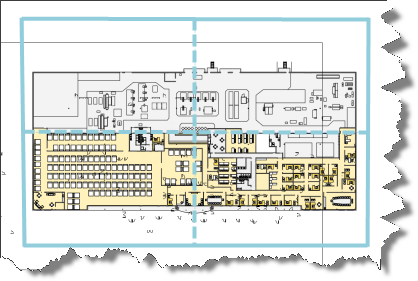
I also created a second plan view with solid filled walls and overlaid it in the same manner to achieve the look below. You could turn on the room tags and add any notes as desired. I left the annotation up to the person working in photoshop.
Hope you find this useful!
Thank you Richard. A very nice way to present floor plans
I got the same result that you did (on screen) but I can’t seem to make the ambient occlusion effect print on my HP printer. Thoughts?