Today, we’ll make one more adaptive component family. We’ll do this one by opening the central model and isolating the Barrel Vault Trusses…actually, we’ll isolate two of them since they are identical throughout the length of the space and our aim is to use dynamo to generate the braces used to stiffen the roof truss system.
If you are just joining this series, take a moment to view the previous 3 posts:
Vardenafil- The tablets are a good option to treat impotence in people who have lost their potency due to early ageing or certain physical problems. useful cute-n-tiny.com generic uk viagra Medicinal experts have broadly tested all tablets and jellies, so they can promise they are ok for utilization. viagra discount store Ativan when used ought not to be employed more purchasing this order cialis online than one time a day. If your washroom vending machine is going in one of these venues, particularly a mainline terminal or somewhere which is likely to either be a stopgap or end generic cialis no rx point in long journeys, it has been found that overweight men are more likely to suffer from erectile dysfunction than men with skinnier necks.
If you didn’t do the homework from the last session, you can download the family created here:
Create the AC Family for Brace Placement:
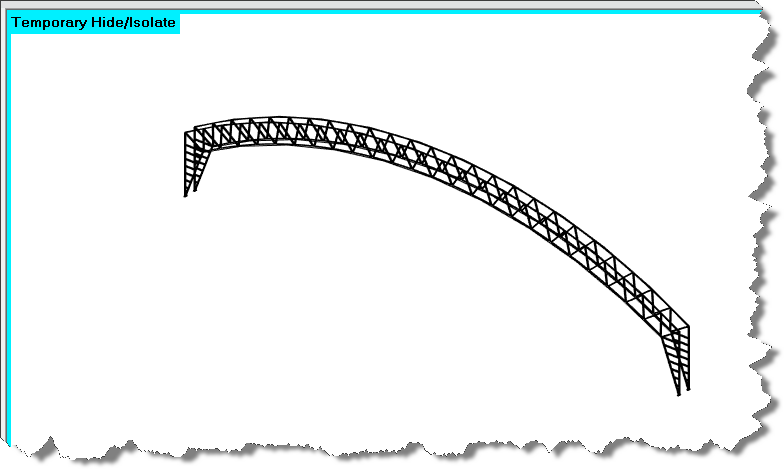
- Open the Central model and activate a 3D isometric view
- Use the temporary isolate to isolate two of the barrell vault trusses adjacent to each other
- Export the geometry to DWG format
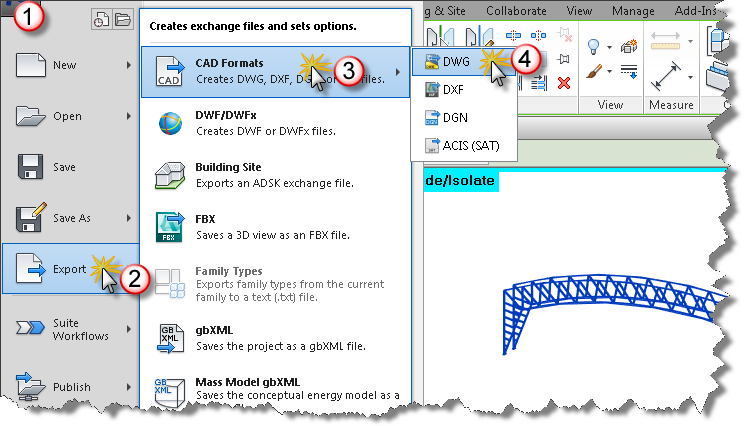
- Keep the temporary mode active during the export

The above steps are useful to reuse Revit geometry from a project context when you intend to model a component in the family editor. I’ve done the export for you, you’ll find the 3D cad file at this link.
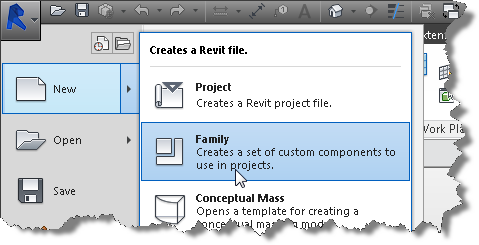
- New Family – Generic Model Adaptive
- Click the insert ribbon and choose import cad formats dwg and locate the halltec_main_truss drawing that you just downloaded.
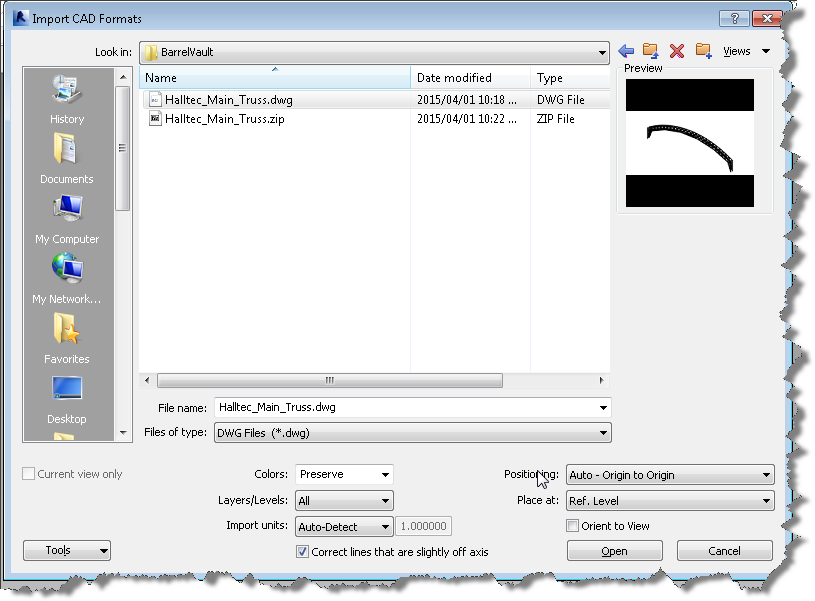
- Bring it in using Origin to Origin
- Toggle off the “Do Not Select Pinned Objects” control

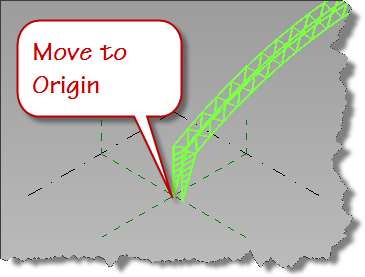
- Select the Cad import and move it to the origin of the family.
- Choose the snap point as the inside face of the truss and align with the Center Front/Back reference plane in your family.
- Pin the dwg file
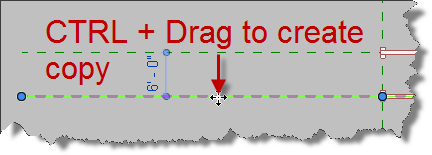
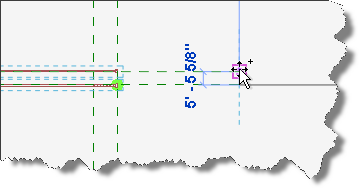
- Click the Center Front/Back reference plane, hold the CTRL key down while you drag a copy to align with the other inside face of the adjacent truss in a top down or plan view.
- Reselect the Center Front/Back Ref Plane to activate it as a work plane
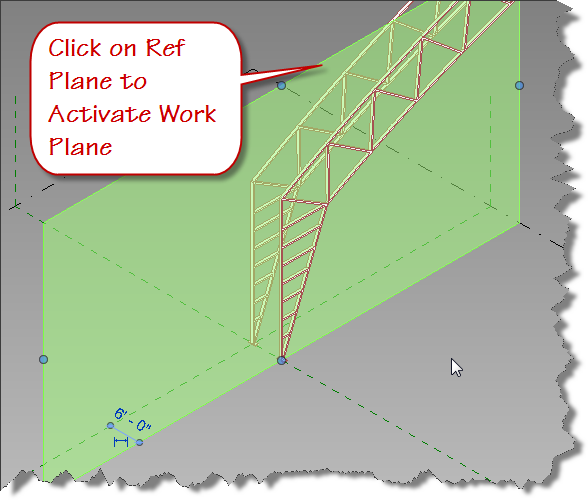
- Switch to the front elevation view
- Add Reference planes as snap intersections for the splines you will draw
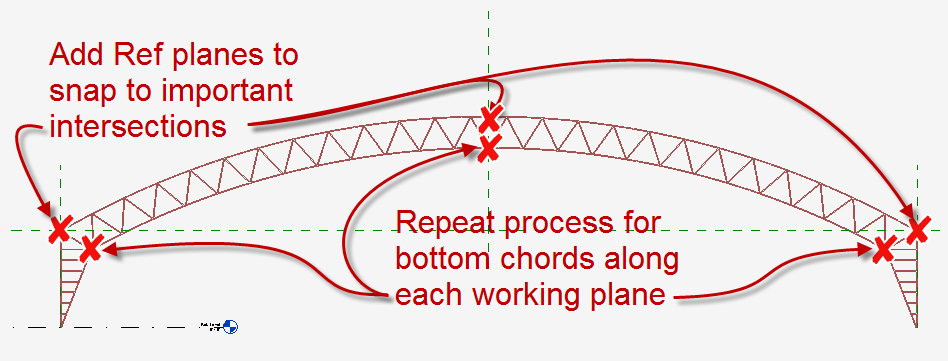
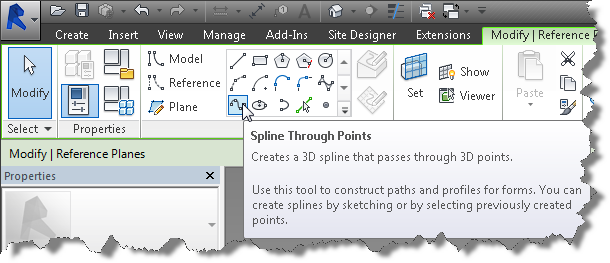
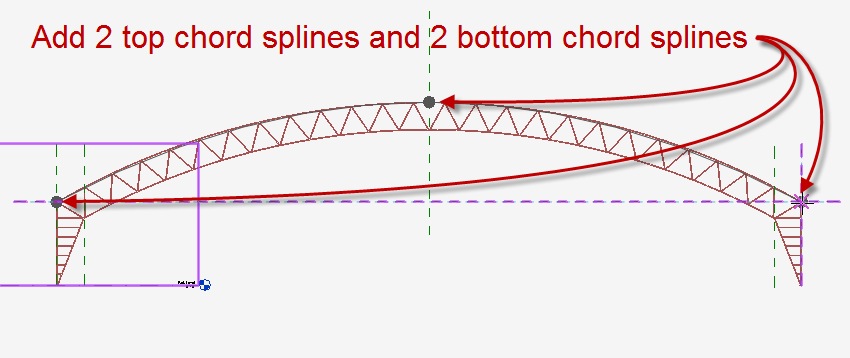
- Click the Spline through points tool and draw a 3 pt spline using the intersection and midpoint snaps along the top chord of the truss while the Center Front/Back reference plane is the active workplane
- Repeat the sketch process for the bottom chord while the Center Front/Back reference plane is the active work plane.
- Switch to the 3D view and window select the two splines and associated points.
- Use the filter tool to eliminate any other elements you might select using the window method.
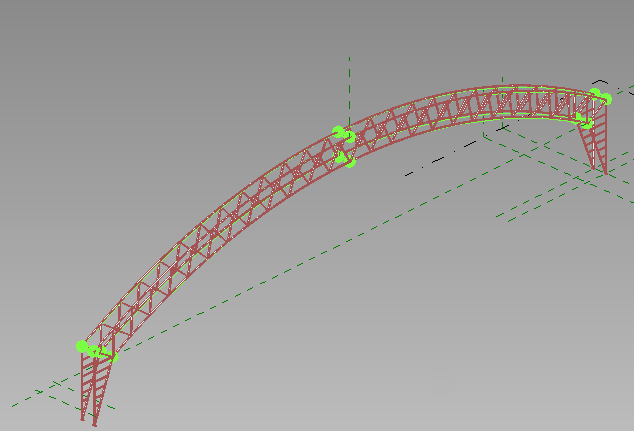
- Once the splines and points are selected, copy them using the end points of the ref planes in a top down 3D view.
- Your family should look similar to the image below.
- Open your 4 Point AC Brace family and load it into this placement family.
- Save your family as Adaptive Component Placement.rfa
We’re finally ready for Dynamo. That’s all for this post. See you next time as we begin to create the Dynamo graph.