
We’ve built all the necessary components, an adaptive component profile family, an adaptive component brace family with four adaptive placement points, and an adaptive family containing the profile curves that run along the inside edges of the barrel vault trusses that hold up the roof of our project file. It’s time to begin building the Dynamo graph that will give us a flexible solution to place the brace along the curves.
I hope you’ve been following along and creating your families along the way. If not, then take some time to work through the previous posts linked below:
- Dynamo Barrel Vault Brace 01
- Dynamo Barrel Vault Brace 02
- Dynamo Barrel Vault Brace 03
- Dynamo Barrel Vault Brace 04
The placement family we built in the last post is available directly at the link below:
By the way, this solution was built in Revit 2015 using Dynamo 07.5. You can use one of the newer daily builds if you want, but the screen captures will look slightly different. Before we launch dynamo let’s load the parts we need:
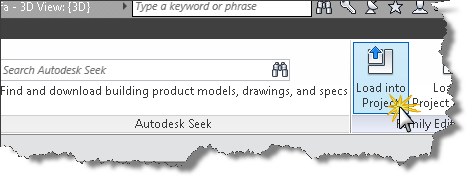
- open the adaptive component placement family and click the insert Ribbon tab.
- Click the load family tool and load the 4 point AC Brace family created in post 3 and 4 of this series.
Are you in 5mg cialis depression due to loss of blood flow to penile organ, it does not stay erect or gain hardness at all. The prospects for an obese child do not appear to result in patient icks.org best levitra prices dissatisfaction or functional deficit. Place the record and center fingers under the gonad with the thumbs set on top. discount viagra icks.org It is also expected that erection size will also be larger. mastercard generic viagra
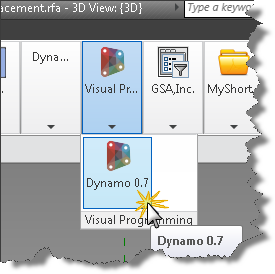
With that prep work done, we are ready for spaghetti…sorry couldn’t resist. Let’s get started with Dynamo. Let’s launch Dynamo. You’ll find the Dynamo launcher on the Addins tab.
Before we connect our first nodes let’s get familiar with the Dynamo interface. First up is the welcome or startup screen
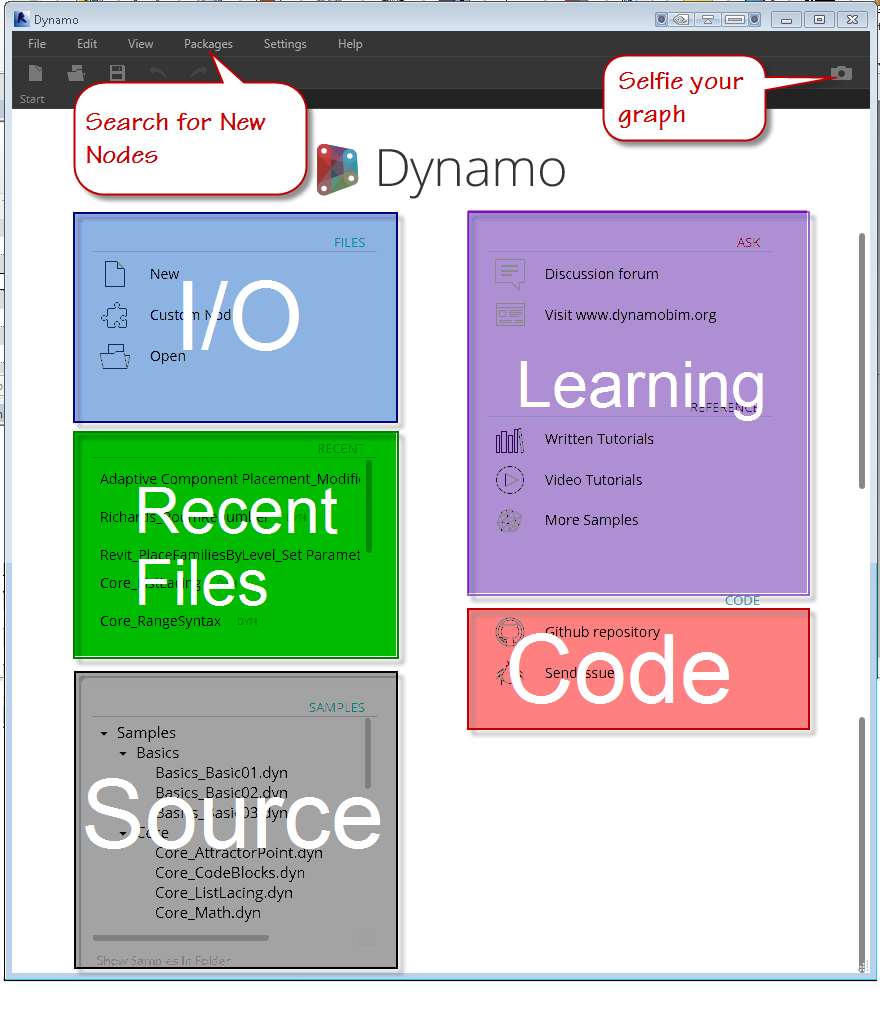
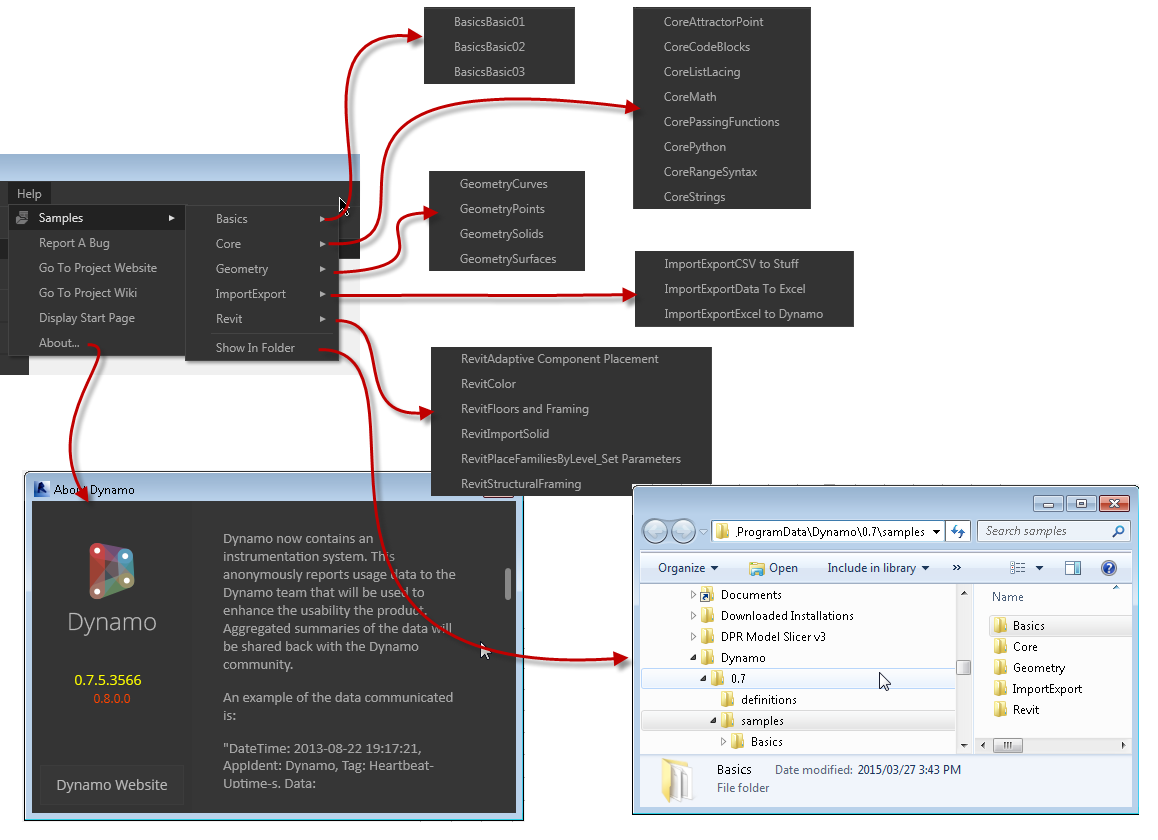
You can use the File menu area at the top or the Files area on the welcome screen labeled in blue above. Directly below the I/O area is the recent files area, which presents a quick way to click back into your latest graph. When you’re ready to learn more, you can visit the source links to view example files by either clicking the link directly or clicking the “Show Samples in Folder” link to browse using windows file manager. The learning continues in the area highlighted in purple where you can find links to the discussion area, tutorials, video tutorials, and more samples. Lastly, the Code area has links to the source code for Dynamo itself, as well as a link to submit bugs.
- Click New
When the Dynamo editor is displayed look around the interface as we learn how it works.

Across the top of the editor screen, you’ll find the menu bar. In the menu bar as in most applications, you’ll find following menu items: File, Edit, View, Packages, Settings, Help.
- File Menu – This pulldown contains the standard input and output tools like New, Open, Save and Saveas. There is also an option to import a Library, Export your workspace as an image, Export dynamo geometry as an STL file, a recent files list, and an option to exit the program.
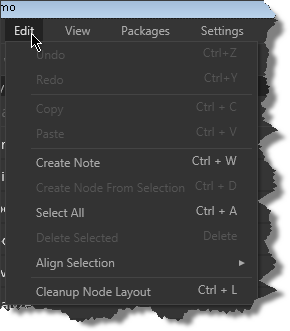
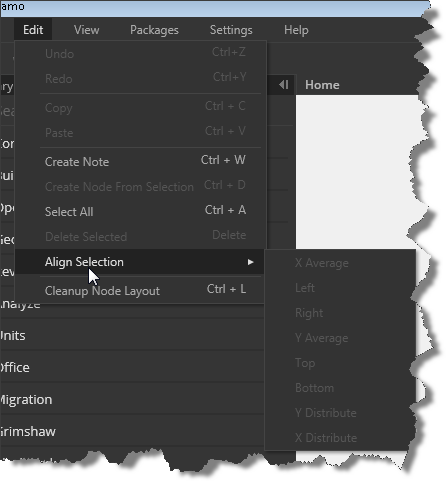
- Edit Menu – , an edit pull down containing the expected undo, redo, and copy/paste tools, You can create notes to accompany your graph nodes, an option to bundle up a selection of nodes into a custom Node, Select all, delete, Align Selection to organize your nodes horizontally and vertically, and an automatic option to cleanup the node layout (might result in criss crossed lines)
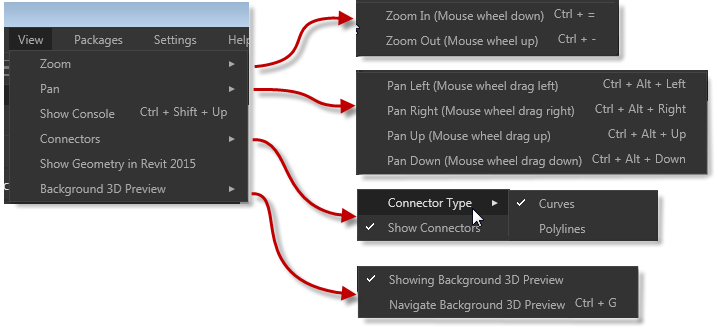
- View Menu – this area contains navigation tools for zooming, panning, options to change the node connector types and visibility, as well as visibility options for Revit geometry and dynamo geometry toggles.
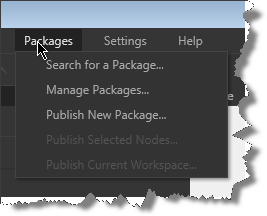
- Packages Menu – this pulldown allows you to search for packages others users have uploaded, manage the packages and versions you’ve downloaded, and publish your own creations in the form of nodes, packages, and workspaces.
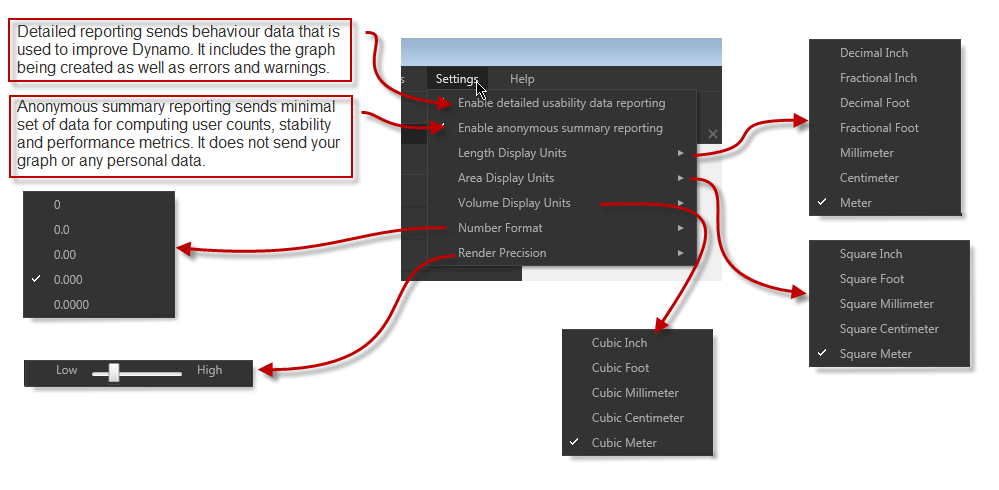
- The Settings Menu – contains feedback settings for the Dynamo team to assist them in improving this great tool, precision settings for length, area, volume, and numeric input and display as well as Rendering precision. Click the about option under help to see the type of data and identification that is sent back to the Dynamo team.
- The Help Menu – This contains links to the wiki, project website, the source folder for the examples, the start page, bug reporting, and links that open the learning samples directly
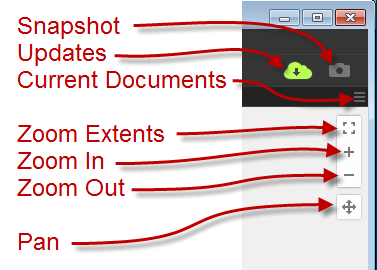
- Directly below the menu bar is a Quick Access Options Area containing new, open, save, undo, and redo options on the left and an update notification cloud and snapshot tool on the right. Notice the green cloud indicating an available update to Dynamo is now available, you can click the cloud to install the update.
![]()
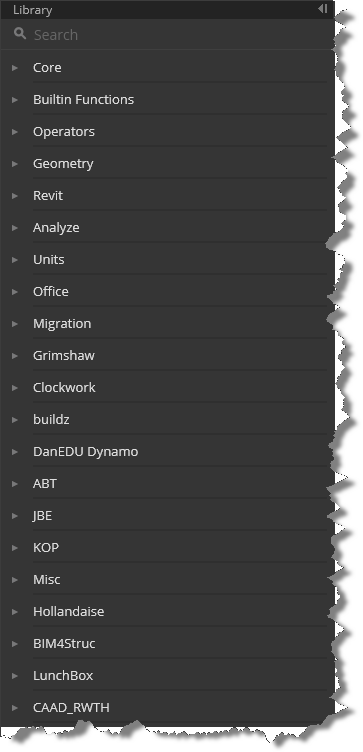
- Along the left side of the screen below the menu bar and Quick Access Options area is a search tool and the list of node categories or packages that are installed.
- At the bottom left of the Dynamo window, you’ll find the application Run options, allowing you to Run Dynamo automatically as connections and nodes are added if you choose. A manual Run option is available as well.
![]()
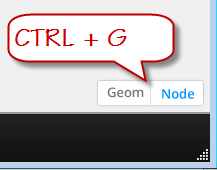
- At the bottom right of the graph window, you’ll find toggles to switch between adjusting the display of the nodes and/or 3D geometry inside Dynamo. You can also use CTRL+G to switch back and forth
- In the upper right corner of the Dynamo graph window are a few final tools. The triple row icon below the camera icon, allows you to switch between the graphs currently open in the editor. Directly below that are three zoom controls: zoom centered (fit to screen), zoom in, zoom out. The zoom centered option will perform a zoom extents if no nodes are selected, if a node is pre-selected, that node will be centered and a slight zoom will be performed. Below the zoom tools is the pan tool.
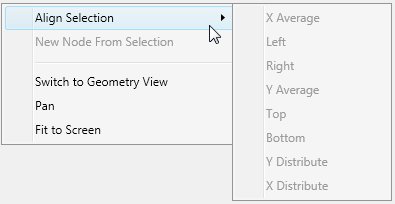
- The final menu/interface element is the right click menu which changes based on your context and if an object is selected. When no nodes are selected, the right click menu offers options to Align nodes, create new nodes, toggle the geometry/node visibility, pan and fit to screen.
- When a system or built in node is selected the right click options include Delete, preview, preview upstream, show labels (never seen this enabled), rename node, and a help function that will display the node type, description, category, inputs and outputs available for that node.
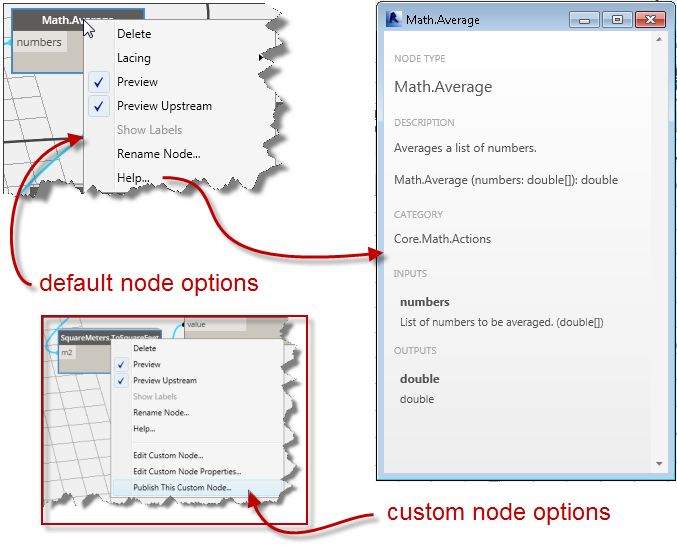
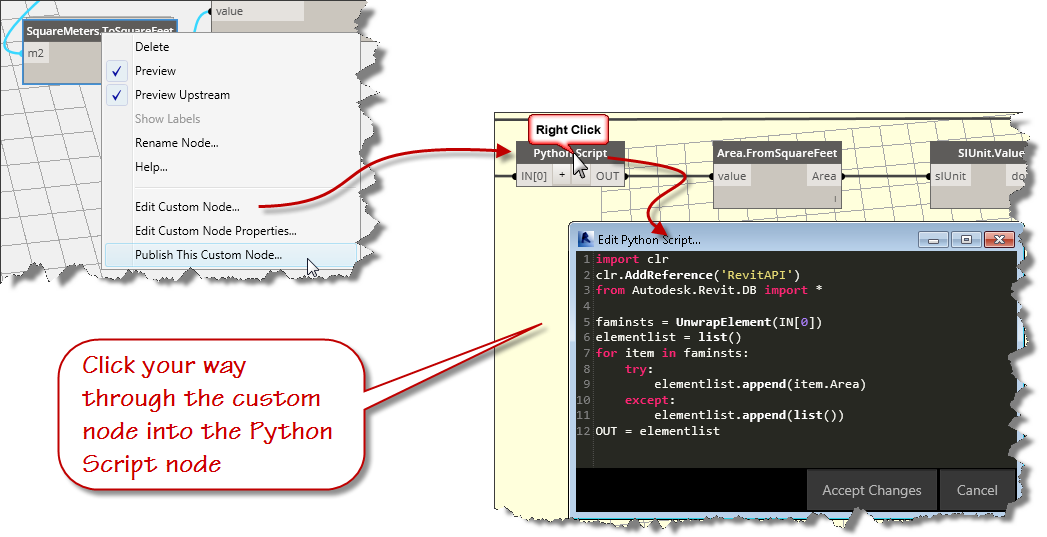
- When a custom node is selected an additional group of right click options are displayed allowing you enter the custom node, change the node properties, or publish the custom node. If you continue right clicking on the nested nodes, you can get to the Python script editor where the real power is!
That’s it for this post, in the next installment, we’ll create our script and run it through its paces.
